ScrapYard Armory

A BattleTech weblog

Mar-15-2009

Cold Wars 2009

Cold Wars 2009 is in the books and it was a great one.  There were plenty of ‘Mechs being smashed all weekend long. I’ve got some great content lined up and am anxious to share with all of my readers.

Lawyers, Guns, and Money: The Mistake

Look for a full after action report from this fast paced and popular scenario in the near future here at the ScrapYard!  The Lone Star Company faces off against Redfields Renegades after a terrible misunderstanding pits the two Inner Sphere mercenaries against each other to avenge an apparent wrong.

Coming Soon!

Other Classic Battletech Events

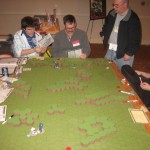
Demo Agent “Speck” and company held many events throughout the weekend including the Fall of Hesperus II, The Demise of Delta Company, and Damnation: Luthien 3074.  Every event was well attended and provided the opportunity for any convention goer to take a shot at reliving Battletech history.

Sadly I could not make every event.  Other priorities like food and the occasional non-Battletech game (gasp!) take precedence.  Here are a few scattered pictures from some of those events.

coldwarsdamnnation2coldwars2009hes3coldwars2009hes2coldwars2009hes1

coldwars2009delta1coldwarsdamnnation1

The Grinder and Demo

Both the grinder and demo games were once again very popular.  I ended up playing quite a bit in the Grinder between games or whenever I had a spare hour to kill.  There was a steady stream of players at the Grinder all weekend long.  A great showing for Classic Battletech!

The demo table likewise was full of new players playing Battletech for the first time.  Nothing says convention like blowing up your first ‘Mech!

coldwars2009grinder01coldwars2009grinder02coldwars2009grinder03

The Painting Competition

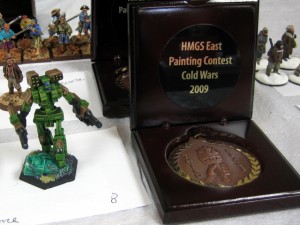
As part of the bring in painting contest, I entered my 15th Lyran Regulars Warhammer.  The competition was fierce.  There were a lot of deserving miniatures this year, far more than I saw last year.  I am pleased to say I managed to take Third Place among the Single Figure Other category.

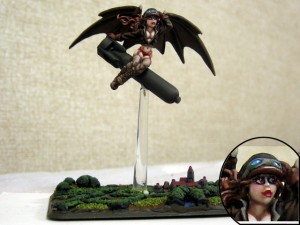
The best in show for the event happened to be my very favorite and I just had to share the quick photo I took while it was on the judging table.  I forgot to get the artist so if anyone happens to know the painter send me an email so I can give credit for this great miniature.

coldwarsthirdplacecoldwarsbestinshow

Iron Wind Metals

Iron Wind brought all of the newest Battletech miniatures including several resin kits to Cold Wars.  I picked up a HPG grid resin and pewter kit and I have to say it looks great.  Look for a terrain post using the HPG later on this month. coldwars2009iwm

Many Thanks to Go Around

My thanks go to Mark “Speck” Yingling and everyone who helps him out during the Con for putting on another great show.  There were plenty of games and lots of amazing moments as Lasers Missiles and Cannon shells flew all weekend long.

Also thanks to Iron Wind Metals for not only attending but helping support the Classic Battletech events by providing product vouchers.  Always a welcome treat at any convention.

Posted under News
Mar-11-2009

Voting Has Started

The painting competition I entered on the Classic Battletech forums has finally begun the voting process.  The first round is to determine among submitters with multiple entrants which will be used in the final painting showdown.

Both my entries are represented.  I hope you have the opportunity to cast a vote.  Just looking at the double entries so far there is a lot of great competition.  I’m looking forward to seeing the full field.

Voting Link Here

Can anyone guess which ones are mine?  ScrapYard contributors and NJ residents need not apply!

Posted under Misc, News
Mar-8-2009

NJCon Has New Dates, New Location

As reported in an earlier post, I had planned to attend NJCon this year as I had last year and host several beginner and advanced games of Battletech.  One thing about last year that made the convention a beast to endure was the lack of air conditioning during one of the worst heat waves of the year.

Well this year the planning crew is moving the venue and the subsequently the date to Fort Dix NJ which among other things has air conditioning!

No more sweating on our record sheets!

http://www.njcon.org

I’m looking forward to hosting games all weekend so if you are in the NJ area come on over and roll some dice!

Posted under News
Mar-3-2009

Battletech Campaign Systems for Dummies

Everyone loves a good campaign. Every miniature wargame worth it’s salt has some form of campaign system.

Classic Battletech is in a unique situation among wargames in that it does not offer a standardized or well regulated competitive environment. While there are those that would love to have it made available, the distinctive casual flare of the game is a lure for many.

What it lacks in the area of competitive play Battletech more than compensates with an abundance of campaign settings complete with unique rules sets and quirks. Look hard enough and you’ll be sure to find a home within the Battletech universe.

For the uninitiated this can all be a bit daunting. I’ve queued up a list of the campaign engines worth your time. Each system has its own unique character that I hope to convey to you the reader in as concise a style as possible. It is up to you to determine just what floats your boat though.

Chaos Campaign

Chaos Campaign is a plot driven campaign system that debuted with the Dawn of the Jihad source book. The system is now a free download.

The premise of the rules set is to abstract all of the background functions of running a force down to a single point value, Warchest Points. Each scenario or Track has a Warchest point cost to enter. This accounts for all of the maintenance and transportation costs that are required to get your force to the battlefield. During the track you will vie for objectives that earn Warchest points back. Optional bonuses that make the Track potentially more difficult or dangerous up the ante, but carry with them an extra Warchest point reward if you manage to complete your objectives in spite of them.

After creating a force, you determine it’s Force Size Modifier and Technology Rating. These modifiers will affect the conversion of Warchest Points to Support Points. Support points are used to repair your units and buy new materials and equipment as well as hire new personnel. This allows a Chaos Campaign to scale to just about any level the players desire. You can play through a campaign with a single company with tracks involving between 4 and 8 units as well as Battleforce scale forces. The flexibility is endless and works well if you ignore some of the Support Point tables.

In addition to the wealth of Jihad era tracks available for purchase from Catalyst, there is a great forum post at ClassicBattletech.com with community created Warchest tracks dealing with many other Battletech Eras.

Materials Required

Game Master Required?

  • Yes. The GM picks and runs opposing forces to fight the player group as well as introduces additional hooks and expansion ideas.

Starterbooks

Forget the Starter moniker. These books mean business and are a worthy addition to any gamers collection, young old or anywhere in between.

Based on the Chaos Campaign Warchest system, each Starterbook is a self contained campaign featuring two famous forces from the Battletech universe. Sword and Dragon tackles the War of 3039 using the Fox’s Teeth and Sorenson’s Sabres while Wolf and Blake takes place during the Jihad Era with the Wolf’s Dragoons facing off against the Word of Blake.

Each force tackles a series of generic missions like Recon, Defend, and Strike in order to build up their force. Once you feel you have enough upgrades and are ready, you play Touchpoint missions. Each Touchpoint revolves around a particular battle and adds additional flavor to the mission. Eventually in each book there is a final showdown that pits the two headline forces against each other.

Both Starterbooks work well with a single player if you have someone to play opposing forces for you and is easily adapted to two player head to head.

The only noticeable drawback in the Starterbooks is the sometimes annoying proof reading mistakes and rules omissions. For instance, while both books mention the ability to upgrade pilots, you’ll go blind trying to find those rules anywhere in the book. A little bit of common sense will go a long way to maneuvering through these inconsistencies. Don’t let it ruin your game. Both books are well worth your time despite their flaws.

Materials Required

Game Master Required?

  • Required for single player. Optional for two-player versus.

Strategic Operations/Combat Operations Linked Scenarios

Linked scenario rules provide an extension of the scenario generation section of Total Warfare. Players build forces using an agreed upon method and play out smaller battles between units after issuing strategic orders in an order writing phase. There are three new scenarios that are used to build on those provided in Total Warfare.

Linked Scenarios is an abstract system that does not track force position absolutely. Each force during a turn will seek out combat with the enemy and is assigned opponents using a simple set of assignment rules. The smaller individual battles that result affect the campaign and will eventually determine a winner before the other force is totally destroyed.

Linked scenarios presents an oddity in terms of its current rules set. Strategic Operations contains a virtual copy-paste from the FanPro product Combat Operations. Not something I was happy to see to be honest. I am working on new additions to make this rule set much more palatable to a game theory advocate such as myself. Stay tuned.

There are certain areas of the rules that are never truly fleshed out like move orders. Without proper rules for the use of a strategic map, movement orders are relatively useless. Hope remains that Interstellar Operations will add this functionality. Don’t hold your breath though.

Materials Required

Game Master Required?

  • No.

Mercenaries

Guns for hire in the 31st century toting 100 ton anthropomorphic tanks bristling with weapons. Yes please. I’ll have some more thank you.

Running your own mercenary force, or at least attempting to, is a right of passage in the Classic Battletech game. Even the Chaos Campaign borrows from this fundamental theme for it’s Jihad plot line.

Field Manual Mercenaries takes you through a rather detailed process of generating a mercenary force from the commander to the administrative paper pushers. You get very detailed when it comes to unit maintenance by tracking time, material, and money. For some, this can be a turn off. If you’d rather spend time playing the actual game instead of figuring out what ‘Mech will get it’s weekly maintenance due to a Tech shortage stick with the Chaos Campaign which hides this minutia.

However, if you do enjoy the fine tuned control and the gritty down in the weeds detail then Mercenaries is the right campaign for you. You may very well spend as much time handling post mission logistics as you will playing missions.

Another aspect of Mercenaries that is unique is the roleplaying bend that the developers took when it comes to mission resolution. Tables and charts will get you right up to arriving in system for your contract but from there on, you are at the mercy of a Game Master who’s in charge of generating encounters and resolving missions.

Materials Required

Game Master Required?

  • Yes.

Solaris VII

The bright lights of the Solaris arenas have been a draw for many players. Who wouldn’t want to try their hand at crawling up the Solaris ranks for a shot at the championship?

A campaign on Solaris VII can take different paths. For example, each player may choose to operate as an individual Mechwarrior plying his trade in the arenas. This kind of adventure can be tightly integrated with the Classic Battletech RPG and has a decidedly roleplaying feel.

If players are looking for a different experience each player may choose to take on the role of an owner/operator of a Stable or Cooperative. You’ll manage your cadre of ‘Mechs and pilots in hopes of racking up victories and hopefully placing one of your elite into the Grand Melee at the end of the season.

Solaris VII is the kind of campaign where the more players involved the more fun it can be.

The information available to players is varied and sometimes difficult to pull together into a tight and coherent campaign.  Make sure all your players are in agreement on how the campaign will be run including how many matches are run each week, what kind of materials and supplies are available, etc. There is a lot of room for player interpretation which is a well known double edged sword for gamers.

Material Required

Game Master Required?

  • Yes.

Quick Summary

Chaos Campaign Starterbook Linked Scenarios Mercenaries Solaris VII
Optimal # Players 1 – 2 1 – 2 2 + 1 – 2 + 4 +
Detail/Complexity * * * * * * * * * * * Variable (* * – * * * *)
GM Required? Yes Yes / Optional for Two Players No Yes Yes
Force Size (‘Mechs) Any 4 – 12 Any Any 1 – 4
The Hook Warchest Points Simplify Campaign Single Campaign Based on Chaos Campaign Abstract Battle System Management, Accounting, and Planning Arena Fighting and Popularity
Posted under Articles
Mar-1-2009

What’s Going to Spot For My Archer Now?

Totally politically incorrect but absolutely hilarious.  I had to share.

Courtesy of Fear the Boot RPG Podcast.

Posted under Misc
Feb-28-2009

Litko Releases Mecha Token Set

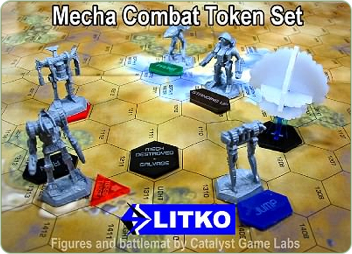
And I am less than impressed.mecha-combat-set-graphic-400

Honestly, it’s great to have a little extra exposure for the game and it is also nice that they have made each token available separately as well as in a set.

However, I just don’t think that the token set is going to prove useful for most players.  Lets take a look at what is being offered.

Core Breach Marker

Interesting, but this piece is almost useless for 95% of Battletech players.  How many people honestly use the Stackpole rule for catastrophic ‘Mech engine failure?  And even if you do play with the Stackpole rule and get it to trigger, you are going to put out this token for what?  To mark the spot where the exploding mech is until you resolve all of the damage?

If you needed a nuke token, they already have them available in their store, and they look cooler also.

Mech Destroyed – Salvage

Potentially useful if you play with ‘Mech rubble (or double-rubble Oh My!).  But I think most players don’t need to be reminded that a ‘Mech is salvaged, just ask for the record sheet.

Shutdown

Very useful.  Fits under your ‘Mech as well.  Good idea.  If only they came in different colors.

Torso Twist

We haven’t had a reaction phase for years.  And since hit locations do not depend on torso twisting, these tokens are about as useful as a set of screen doors on a submarine.

Run- Walk

Useless.  Movement dice do everything you need including jump and movement mods.  A truly unnecessary token.

To Ground – Standing Up

If you need a token to remind yourself that your ‘Mech is standing, you have other problems.  To Ground sounds like something an infantry unit would do. Maybe I never got to that section of TacOps yet.

Prone – Kneeling

Prone is useful and kneeling only if you and your players are actually using such rules from TacOps.  Ultimately confusing for someone who may not have TacOps and not realize that such a rule exists for players who must have everything.
Jump – Skid

Jump is useless as described above.  Skid is nice to have if you run lots of urban games or hovercraft or VTOLs.
What’s NOT Included
  • Pilot Roll Markers?
  • Target Assignment Markers?
  • Pilot Unconscious?

There are a bunch more I’m sure.  Chime in with a comment if you think of any more that would be useful.

I’m not here to bash on Litko.  I think they make good products but this set misses the mark.  I am still a fan of their Custom Token Sets for all things Battletech, Aerospace, and everything in between.  You can have all of the control you really want by creating your own custom token set with the colors you want, the text you want.  You can make it work for your game rather than be forced to use a token set built for somebody else’s game.

Find out more about Litko Custom Token sets here.

Posted under News
Feb-21-2009

Mechwarrior Figures for Classic Battletech – Redux

mwmadcatmaxim

I’ve long advocated the use of Mechwarrior figures to play Classic Battletech.  It just makes sense to me and I think my readers agree.  Since my original post on the subject debuted in July of last year it has been the most popular ScrapYard article every single month.

Since then my modest collection of a battalion of converted figures has ballooned into a short combined arms regiment of ‘Mechs, vehicles, and even infantry.

mwall

Is Quick Strike the New Mechwarrior?

The introduction of the Strategic Operations core book gave us a special treat in the Quick Strike rules.  I swear, this rules set is the new reincarnation of Mechwarrior Age of Destruction.  What’s so good about it?

  • All the charts you need to play fit on two single sided sheets
  • Each company/binary/2 level IIs of figures takes up one sheet of paper
  • ‘Mechs have special abilities to reflect specific Classic Battletech loadouts

Quick Strike features fast play and does away with copious record keeping.  It is a great transition from the Mechwarrior game to the Classic Battletech style of play.  It retains the combined turn mechanic that Battletech players love while simplifying game play without too much sacrifice in detail.  The developers have outdone themselves with this latest update.

It may not be for everyone and I am probably getting ahead of myself in thinking that this new set of rules could replace Mechwarrior completely.  There will always be those out there who will never give up their combat dials.  Nothing wrong with that at all but it also doesn’t hurt to have this new way to play.

mwwoballnewmwthormaximnewmwinfantryvees

mwhacthetinfantrymwdraconisallmwcenturiontboltnew

More Miniatures, More Things to Blow Up

Even if you are not going to give Quick Strike a try, Mechwarrior figures are a fun and easy way to expand your miniatures collection so long as you have access to 2″ hex terrain or are adventurous enough to go with hexless miniature rules.

Keep your eyes peeled.  There are plenty of deals out there on Mechwarrior figures and they are only going to get better.

Posted under Minis
Feb-18-2009

King of the Mountain

kotmfinal2

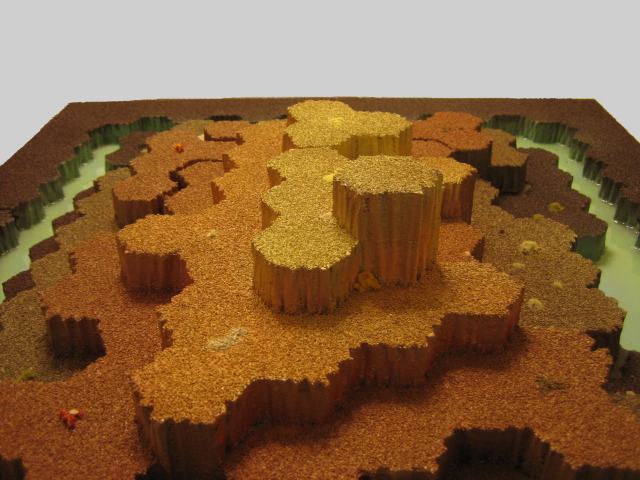
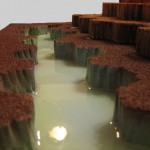
Hex maps in 3D provide the best of both worlds.  The attractive looks of 3D terrain meets the simplicity of map sheet rules.  I always have fun building maps with my good friend and fellow contributor Saxywolf.  Last weekend we had a go at building an iconic map from the Solaris 7 MapPack.

King of the Mountain is a map that just screams to be in 3D.  It was a pleasure to build and I just love the results.  Read on to see how all the bits of foam came together as we built this great looking map.

Materials List

  • Pink insulation foam
  • Hex paper and pins
  • Hot wire foam cutter
  • Apple Barrel Paints (Brown and Black)
  • Paint brushes
  • Elmers glue
  • Woodland Scenics Medium Ballast
  • Poster board (40 x 30)
  • Various shades of spray paint
  • Woodland Scenics Realistic Water
  • Miscellaneous ground cover (static grass, flock, rock debris, foliage)

Planning the Map

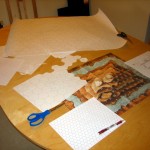
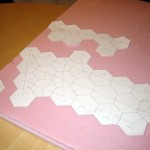
We made ample use of paper templates to help us mark what we needed to cut.  Each level is it’s own cut of foam, so getting them right was important to keep the map accurate.

We chose to use 2″ hexes for our map to give our miniatures a little extra breathing room on the battlefield.

Here at the ScrapYard we use large format paper printouts to make cut-outs for the large level 0, level 1, and level 2 terrain.  If you don’t have such a luxury don’t fret.  Standard 8 1/2 x 11 sheets  work just as well with a little patience and a lot of scotch tape.

Once you have your paper templates ready, use a few pins to attach them to your foam.

kotmplanningkotmpaperandpins

Cutting the Foam

kotmcuttingYou are going to need a Hot Foam Cutter of some kind for this task.  You can get one from any respectable model railroad store.  We made use of a system from Hot Wire Foam Factory and it worked great.  Whatever tool you end up using, make sure you use as thin a wire as you can get away with.  The thinner the wire, the less stringy strands will result from your cuts making them faster and more accurate.

Use your templates as a guide and cut out all of your levels.  Depending on how many levels and the complexity of the shapes you are making, this may take a while.  If it was easy, it wouldn’t be nearly as cool.

Shaping the Foam

Shaping the edge of your foam will give it an authentic look.  We don’t see ninety degree angle cliff faces in nature and your hills shouldn’t either.

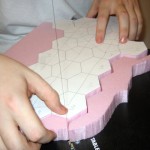
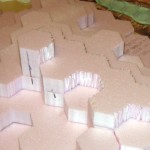
kotmshapingFirst things first, lay out your levels on top of each other as they will fit when they are attached.  Look at the level changes and mark those that are more than one level high.  You are going to shape the single elevation edges first.  Once you have multiple levels glued together you will then shape the two and three level change faces.  See the picture for a sample of what I’m talking about.

Use your hot foam tool of choice and work across the surface with a wavy pattern.  Use a piece of scrap foam before you start on the real thing if you are unsure of the technique.  Once you do it yourself and see the results, it will become obvious how to get a simple yet effective result.  After only a few edges you will be a pro.

As we shaped the foam we glued levels together.  Once the glue had a chance to set we shaped the two and three level cliff faces.  At this point though, we did NOT glue the level 0 terrain to the rest.  It was kept separate for reasons described below.  Keep on reading!

Base Coating

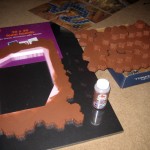
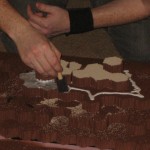
kotmbasepaintBase coating provides your terrain protection from the spray paint you are going to apply later.   We use Apple Barrel paint because it is cheap and easy to work with Acrylic based paint.  It covers well and seals the foam so we can apply spray paint later on.

Wait for this base coat to dry for a few hours and go over it again to make sure you have hit all of the nooks and crannies. Depending on how detailed your edges are you are going to want to make sure the whole piece is covered.

Putting It All Together

Our base is a large (40″ x 30″) poster board we got at Staples.  We glued only the level 0 terrain to the board.

One of the issues that we have found on previous maps was warping of the poster board over time.  When you are gluing two different materials together like we are, you are bound to notice a bow or sag to your map as the poster board flexes under your foam.  This is unavoidable unfortunately.  We have thought of some methods to stiffen up the construction but all of them would inevitably lead to a heavier and bulkier map.  One of the major advantages of using foam and poster board is how light and transportable they are.

As a mitigation we glue only the first level of terrain to the board.  Anything level one and above gets glued together but not to the level 0 you glued to the poster board.  What you end up with is a board with removable terrain features.  Not only does this result in less warping but also make the board much easier to transport and store.

Adding Some Texture

Break out the Elmers and make sure you have a lot of it to spare.

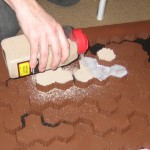
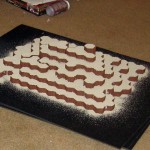
In order to make our map look as good as it can we base the top part of our foam with a medium railroad ballast to give it a proper texture.  Using a foam brush we spread a healthy amount of Elmers glue onto our terrain.  Once the glue is down we sprinkle liberally with our gravel texture.

After all of your terrain is covered, give the last layer about five minutes before flipping it upside down to get off the gravel that didn’t stick.  I hope you have some sort of large paper underneath to catch the excess.  We dumped it on the poster board, brushed it onto a piece of paper and poured it back into the container.  You will be using less gravel than you think.  Make sure you don’t waste what comes off during this step.

Make sure you give this step as much time to dry as you can.  Excess glue can leach into the base coat of paint making your foam potentially vulnerable to spray paints until the whole thing has time to dry and set completely.

kotmgluekotmglue2kotmtexture

Painting

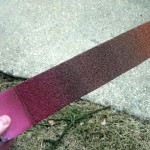
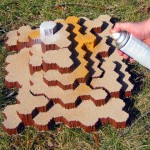
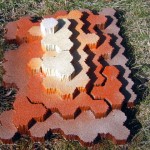
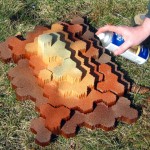
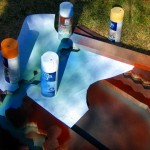
We took all of our terrain outdoors for a whole lot of spray paint.

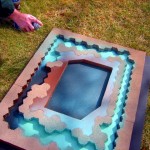
There certainly is an art to doing this well.  I have to give all of the props to Saxywolf for an amazing job choosing colors and blending them together just right to give us the colors you see on the final map.  He made clever use of some of the leftover paper templates to cover up portions of the map when applying the last colors on the acid moat and then touching up the brown by covering the acid moat.  If you can wait for a day with no wind, you will not have to keep re-spraying to touch areas up. To blend the the entire map together a bit more, he used a mid-tone color from farther away.

Take your time and you’ll do fine.  If you happen to feel overwhelmed, use another piece of scrap foam (properly base coated with Apple Barrel paint) to try out some of the colors you intend to use.

kotmtestingkotmspraypaint1kotmspraypaint2

kotmspraypaint3kotmspraypaint4kotmspraypaint5

Water Effects
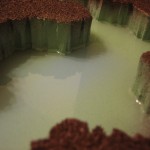
To add a little extra to the acid moat we used a pourable realistic water effect from Woodland Scenics.  Even after drying overnight the water wasn’t completely cured.  Keep this in mind as you plan as the stuff becomes very tacky and will catch anything that gets near including flock and static grass that you may want to add in the last steps.  I’d advise you cover it very well and give it extra time to dry.

Adding the Details

Hex delineation is important for these 3D maps.  We are still relying on hexes for range and line of sight after all.  In previous maps we used a sharpie to put a dot where individual hexes were not easily seen.  For King of the Mountain we tried something a little different.  We used little bits of terrain, rocks, static grass, and foliage to mark the hexes providing character and functionality in one swing.

Here are a few shots of the finished product.  We managed to build this map start to finish in one weekend.  Between each step that required substantial dry time we played a few games of Battletech.  Nothing like smashing ‘Mechs while you wait for the Elmers to dry.  If you look closely you can see the dark brown base remains unattached to the mountain in the middle.

kotmfinal1

kotmfinal3kotmfinal4


Posted under Terrain
Feb-18-2009

Robot Viking Miniature of the Week

warhammer01My recently painted Warhammer has made it onto the front page of a gaming news blog Robot Viking.

Full Article

I’m thrilled to share my work and it’s great to receive positive reviews from those outside the Classic Battletech community. The added exposure is a great thing for the game too.  Just about everyone inside the Battletech circle knows what a Warhammer looks like.  I hope that at least a few people who see the Robot Viking article may be intrigued enough to take a look at what’s cooking at Catalyst Game Labs.

For those of you who may have wandered over make sure you take a moment and look at the Leap Into The Action page at ClassicBattletech.com.  It holds a great assortment of information on the game including more than enough free PDFs to satisfy any curiosity you may have.

Posted under Minis
Feb-14-2009

Custom Deciduous Trees

battletech-trees-final

Sometimes a mapsheet just looks bland and boring.  Perhaps it’s time to branch out and try some Battletech miniatures rules.  Or maybe, all you really need is a little visual appeal to add to those maps to bring them to life.

Here at the ScrapYard we’ve gone to great lengths to come up with custom trees for our Battletech games.  You’ve probably already seen some finished ones in the background of recent pictures.  Here is a detailed view of how we did it and how you can make your own.

MATERIALS LIST

  • 26 gauge bare wire (Craft store like Michael’s)
  • Wire Cutters
  • Super Glue (Gap Filling, 5-10 sec drying time)
  • Elmers Glue
  • Epoxy (5-Minute Epoxy is available in many craft or hobby stores)
  • Corks, top of box, pins OR tape, piece of cardboard
  • Primer (Spray paint is easier, but brush-on is ok too)
  • Brown Paint (Again spray paint is easier.  Different shades if you want different color tree bark.)
  • Washers
  • Black felt (Craft store like Michael’s)
  • Shades of Clump Foliage
  • Shades of Fine Turf

Cut Your Wires To Length [pic 1]

Cut between 18-30 wires 2.75″ to 3.25″ in length.  Varying the length will give you different tree heights, while the number of wires effects the thickness of the tree and the number of branches.  Too few wires and it starts to look patchy, and much more and you need a thinner wire or it becomes difficult to twist and makes the wire texture harder to cover.  Just remember that the roots use up about 1/2″ of the wire length.


Cut, Twist Trunk, and Twist Roots

Twist the Tree Trunk [pic 2]

With all the wires together, twist a portion of the wire approximately 1/2″ from one end.  Let them splay a little as you squeeze them when twisting as this makes it easier (and possible) to twist them around each other.

Superglue the wires at the twisted location so it doesn’t fall apart while twisting the rest of the tree.  Don’t add too much as you don’t want to drip or run down the wire and end up gluing other sections of wire together.  It will need extra time to dry as it need to fill gaps rather then just hold two surfaces together.  If you can hold the tree twisted tightly for a few seconds without gluing yourself to it, it will dry faster.

Twist the Roots and Branches [pic 3]

Twist 3 or 4 groups about 1/2″  from the end to make roots.

Twist all the tree branches.  I usually just do it in a semi-random pattern.  Often the lower branches stick way out as they do on the right of tree 4 [pic 4].  You can either clip them, or twist them into a loop [pic 5] which allows you to attach a bit more greenery.  Twisting at least two wires nearly to the end makes them stronger.  Remember that it’s the clump foliage that gives the tree volume, not individual wires.battletech-trees-2

Superglue all the main branches for added strength and stability before moving on.

Smooth Out the Wire Texture [pic 6]

To avoid getting glue on your fingers try gluing your trees to a cork [pic 9], popsicle stick, or even a scrap piece of cardboard.

Carefully coat the tree with Elmers.  Wait till it dries and repeat.  I use a toothpick and spread it all around as it dries. You are trying to smooth out the spiraling wire groups so it looks more like a real tree and not a twist of wires.

Take a Break From the Tree to Make the Base

battletech-trees-3Spray paint your tree base, in our case a metal washer [pic 7], with black primer.

Once the primer has dried, glue the washer to a piece of black felt [pic 9 at left] with Elmers.  You can use superglue if you want it to dry faster, but it will soak into the felt so quickly that it will leave a residue on whatever is underneath the felt while it dries. Once the felt is secure cut out the base from the rest of the felt.

Fill in the washer with something cheap.  Epoxy is ok, but not as cheap as old putty, tightly folded newspaper, scrap cardboard, or anything else cheap so you don’t end up filling it with more expensive and loose turf.

Time to Paint and Add the Leavesbattletech-trees-4

Spray on a primer (we used white) followed by the desired main color [pic 9 at right].

Once the paint on the tree is dry it is time to attach the tree to the base.  Mix some epoxy (thoroughly!) on a piece of cardboard or index card.  Apply blobs to the roots and set on the washer. I use epoxy when gluing a wire tree down because superglue has a hard time holding unless one surface is pressed flat against the other and the roots don’t have much surface area to glue down.

Superglue Clump Foliage to the ends of the branches, and maybe a few smaller pieces further toward the trunk.

Coat the base in whatever mixtures of turf you want and your tree is finished and ready for the battlefield.

Some Pitfalls to Avoid

battletech-trees-mistakesTo the right you can see what happens when you don’t mix epoxy in equal proportions.  The epoxy will never harden. To avoid this, squeeze the epoxy in equal portions onto an index card, and mix it with a toothpick.  This allows you to mix in less of one part if you put too much of it on the card and when you use the toothpick to move it from the index card, you only grab the well mixed portion.  I tried mixing it right on the base.

The copper wire pine tree to the right is a good example of what a tree looks like when you have many many branches and a very thin wire.  It bends so easily it gets deformed a lot.  I won’t bother trying to make anything of it.

Since these battles take place on a multitude of planets, environments, and seasons, feel free to use and mix all sorts of wild colors/shapes/turf, etc.

I prefer my Heavy vs Light Woods to be clear.  You can use Forest Green (its darker then Dark Green; almost black) and/or multiple trees of differing heights on a single base to represent heavy woods.
You can use course turf/bush clump vs fine turf to differentiate between open and woods on the map itself when the trees aren’t on that particular hex.

Posted under Terrain