ScrapYard Armory

A BattleTech weblog

Archive for the ‘After Action Report’ Category

Jul-6-2017

Hostile Borders – BattleForce

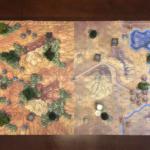
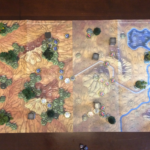
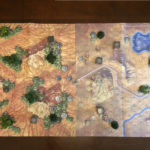
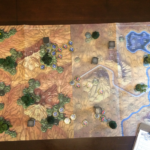
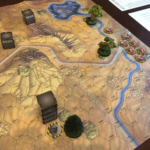
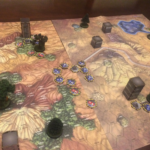
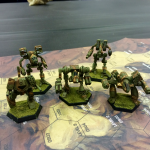
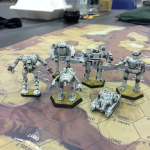
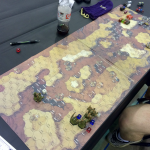
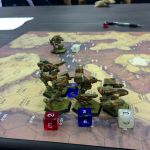
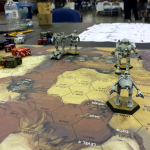
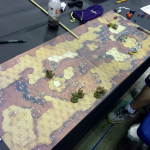
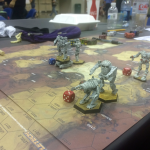
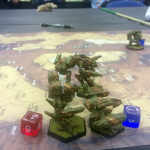
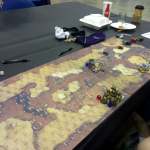
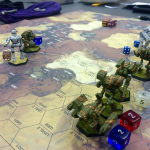
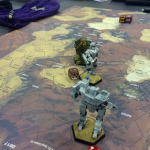
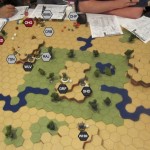
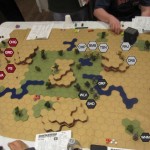
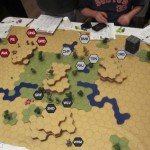
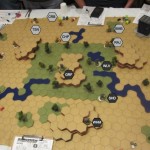
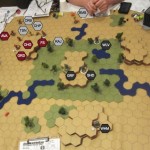
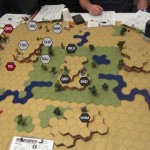
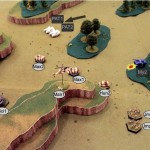
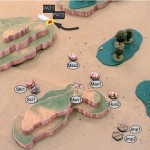
The following objective based battle was played out using the BattleForce rules in Strategic Operations.  Opposing forces from Steiner and Kurita face off to control vital objectives on the battlefield.

Each force consisted of a full Mech Battalion with an additional Assault Command Lance (40 ‘Mechs for each player!).

TO&E

Download the Hostile_Borders_TOandE record sheets as a PDF.

Objectives

Victory points are scored during the game by eliminating opposing lances (3 points) and controlling the three objectives on the board each turn.  The center objective is worth 3 VP each turn while the other two are worth 2 VP.

Objectives are controlled by having the majority of units adjacent to the objective marker.  Control is checked and scored at the end of each turn.

Objectives block movement but do not block line of sight.

Deployment

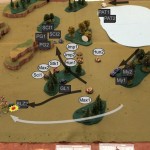
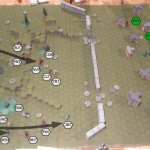
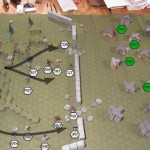
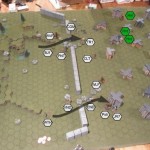
Steiner lines up their forces evenly across their map edge.  To the North, a company of lights and mediums look to speed their way towards the closest objective while to the South a heavier force looks to navigate the wooded terrain to contest the far objective.

Kurita meanwhile sets up heavy in the middle, to make use of the bridge to get the majority of their non-jump capable lances across the river.  Light lances stretch out to the North and South flanks looking to gain ground and make advances on the objectives.

Turn 1Kurita wins Initiative

The first turn sees both forces move at top speed towards the objectives.  Kurita remains clumped towards the middle of the battle while Steiner remains spread out.  Light lances are making top speed to nearest objectives.

Victory Points: Steiner 0, Kurita 0

Turn 2Kurita wins Initiative

Both forces continue their march towards each other with both sides using Light lances to secure one objective.

Opposing forces remain out of range for the time being.

Victory Points: Steiner 2, Kurita 2

Turn 3Steiner wins Initiative

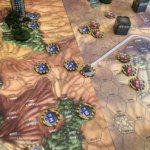
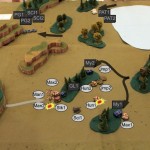
Steiner manages to race a heavy lance into position to secure the center objective while the main component of Kurita forces struggle with the terrain.  At the same time, most of the Kurita Heavies are nearing prime positions on the hill overlooking the center of the battle.  Defensive positions are setup around the North and South objectives while opposing forces both probe at long range.

Weapons are finally finding their range as missiles, lasers, and autocannons erupt along the divide between the two forces.

At the top of the map a Kurita Jenner crumbles under combined fire from a Steiner medium lance.  A Kurita Trebuchet has its head shot off by long range fire.  Return fire scatters damage to armor.

A Kurita Heavy lance of Archers uses their height advantage to line up shots against the Steiner lances securing the center.  Missile rain down inflicting heavy damage to a Steiner Heavy lance.  However, damage is done mostly to armor as Kurita selected to spread out shots instead of concentrating fire.

Victory Points: Steiner 7, Kurita 4

Turn 4Kurita wins Initiative

Steiner establishes a defensive stance and secures cover where possible.  The Steiner Heavies to the South are slowly working their way through terrain to support a Light Lance which retreats slightly into cover.

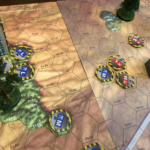
Near the North a probing Steiner Medium Lance is engaged by a Kurita Light and Medium Lance while in the center, Kurita lines up all three Heavies to prey on the lone Steiner Heavy Lance securing the center objective.

To the North the combined Kurita fire kills off a Phoenix Hawk while return fire scours armor but little else.

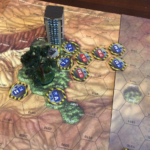
In the center, the Kurita Heavies rain death upon the Steiner Heavy near the objective and decimate three of four Mechs, reducing them to slag.  Return fire concentrates on the Kurita Archers but can only peel away armor.

Victory Points: Steiner 12, Kurita 6

Turn 5Steiner wins Initiative

Reeling from the withering firepower of the Kurita Heavies, Steiner forces retreat from the center objective.  The nearly destroyed Steiner Heavy Lance sulks backwards for cover.  Kurita seizes the momentum and secures the center while striking at the Steiner controlled objective in the North.  Steiner consolidates its forces to counter the assault on the North objective while continuing to spar with forces in the South. Steiner Heavies continue their painfully slow march to join the fray.

Concentrated fire from both sides tears armor and structure apart.  A Steiner Sentinel blows up in an ammo explosion.  To the North the Steiners begin making up casualties as they tear apart one of the Kurita Medium lances, securing a first complete lance kill.

Steiner Light lances lose two Commandos and the Command Lance takes heavy damage and critical hits to a Zeus’s weapons.  Luckily several volleys from the Kurita Archer lance fail to find their targets.

Victory Points: Steiner 17, Kurita 11

Turn 6Kurita wins Initiative

Steiner pushes into the South objective, finally supported by their Heavy lances.  Steiner Mediums run flanking maneuvers using available cover.  The Steiner Command lance reinforces the North objective against the sustained Kurita assault.

Kurita presses the Northern attack with Heavies from the center, leaving the Archer lance to control the center objective.  Kurita forces in the South make best use of available cover to attempt to counter the fresh Steiner lances now engaged.

The Steiner Heavies in the South expertly divide their fire to fully obliterate the defending Kurita Medium lance.  The final return fire scratches some armor but can do little more before crumbling.  The defending Kurita Lights manage to combine fire to destroy a Hatchetman and cripple a Sentinel.

In a surprising long range attack, the Kurita Command lance almost completely destroys a Steiner Medium lance.

To the North, both forces trade volleys shedding armor and trading critical hits.  As a whole the Steiner forces, using the woods to their advantage, seem to come out better.  A second Kurita lance, a Medium, meets its doom while several Steiner lances are hanging on by a tread.

Victory Points: Steiner 22, Kurita 14

Turn 7Kurita wins Initiative

Steiner fades from the Northern objective, still fighting to contest the objective but forcing the Kurita forces to fight for every inch.  Steiner Medium lances in the center of the battle turn into harassers behind the Kurita lines.  Kurita does not choose to pursue the harassers and reinforces the fight for the North and South objectives with it’s Heavies while the Command Lance holds the center.

Kurita loses the last of a Light Lance while its other two lances hold the line while defending the Southern objective.  One Archer goes down while the rest of the Kurita Heavy lance suffers minor damage.

Steiner loses another Commando while multiple lances shed armor to Kurita attacks.  A surprise long range attack on the Steiner Command Lance scores multiple Weapon criticals.

Victory Points: Steiner 27, Kurita 19

Turn 8Steiner wins Initiative

Kurita forces shrink back from attacking the Southern objective to secure the center.  The battle over the North continues with Kurita pushing with its heavy lances.

Weapons fires pours across the battle.  The Steiner forces decimate one of the Kurita Heavy lances, downing two Mechs.  The Steiner Heavies take major damage but manage to only lose a Thunderbolt.  The Steiner Command lance also takes heavy damage.  Armor slags off in droves but critical hit rolls come up empty.

Victory Points: Steiner 29, Kurita 24

Turn 9Steiner wins Initiative

Kurita concentrates the attack on the North while conceding the Southern objective.  The last Kurita Light lance, sensing the end is near, moves to contest the Southern objective to draw at least one if not two Steiner lances away.

Steiner makes a surprise move and mostly abandons the Southern objective, leaving it only contested with a single lance.  All other Steiner units collapse towards the center to face off against the Kurita Command lance and the Heavy Archer lance.

To the South, the Kurita Light lance is destroyed by SRM volleys but not before touching off an ammo explosion in a Commando.

Kurita kills off two Steiner Command Mechs while stripping another of armor.  Return fire from the Steiner’s cracks two Kurita Command Mechs, weapon critting an Awesome.  Both Command lances pay a heavy price this turn but somehow remain intact.

Victory Points: Steiner 32, Kurita 29

Turn 10Kurita wins Initiative

Steiner forces continue to collapse on the center objective.  Kurita escapes the center while securing their hold on the Northern objective.  The Southern objective is left to Steiner who guards it with the remnants of a Light lance.

Weapons fire is sporadic and many previously damaged Mechs are felled by opportunistic shots. One more Kurita lance meets its end while several Steiner lances are left limping but still alive.

Victory Points: Steiner 40, Kurita 31

After the Dust Settles….

The final score does not tell the full story of this battle.  It was a lot closer than it may initially appear.  Kurita’s Heavy lances decimated Steiner forces for the first half of the game.  Many Steiner lances were left hanging on with a single unit remaining.  A quirk of the scoring system meant that Steiner held onto the lead throughout most of the game but it was a lot closer than that.

The second half of the game saw Steiner gain superior position against the pressing Kurita attack and begin to lose some individual battles while winning the war.  A great game in the end.

Posted under After Action Report
Aug-26-2015

Tukayyid – GenCon 2015

This battle was part of the Battle of Tukayyid fought at GenCon 2015.  This was a break out game which featured a smaller side battle that would have an impact on the main game depending on who won.  My thanks go out to my opponent and the Catalyst Demo Agents for putting on a great show and allowing us to participate in this great battle.

Choke Point – Canyon Pass

This canyon is a vital pass to extend supply lines.  Whoever controls this pass will have a distinct advantage, moving supplies and troops easily.Tukayyid - - 1

Which ever side wins the scenario controls the pass, allowing 1 lance not currently involved in a scenario to be restored to it’s original strength.

Clan Wolf

  • MadCat
  • Vulture
  • Cauldon-Born
  • Blackhawk
  • Huntsman

Tukayyid - - 2Comstar

  • Flashman
  • Shootist
  • Thug
  • Crab
  • Black Knight
  • Rommel Tank


Turn 1 – Clans Win InitiativeTukayyid - - 3

The opening turn has both sides move forward but do not find line of sight among the canyon walls.  Comstar splits its forces between the high and low ground.  The Shootist, Black Knight, and Rommel take the low road leaving the Crab, Flashman, and Thug to cover the high ground.  The Clans overload the high ground, leaving only the Blackhawk to contest low.

No shots fired as there was no line of sight.

Tukayyid - - 5Tukayyid - - 4

Turn 2 – Clans Win InitiativeTukayyid - - 6

All forces advance and begin to jockey for position among the tall cliffs and abutments of the canyon.  Both players do their best to hug the walls for cover while attempting to group long range shots against those caught even slightly out of position.

The resulting barrage of long range shots is sporadic and ineffective.  A bit of paint gets scratched but both forces shrug off the damage.

Tukayyid - - 8Tukayyid - - 9

Turn 3 – Clans Win Initiative

Being cautious, the Clans actually back up, attempting to rely on long range shots to whittle the Comstar forces down.  Comstar returns the favor and keeps its distance while opening up some firing lines.

Weapons fire is again only semi effective.  The Black Hawk is able to score two hits against the Shootist while suffering only minor arm damage in reply.  Up top, the Vulture takes the brunt of the Comstar attack but looks no worse for wear.  The Flashman is brutalized by concentrated Clan weapons fire.  The right torso is stripped of armor and a medium laser is blasted into scrap.

Tukayyid - - 10Turn 4 – Inner Sphere Win Initiative

The action begins in earnest as the Comstar forces in the bottom of the canyon are set upon by a daring Blackhawk pilot riding high on it’s jump jets.  On the upper level, the Clan forces rush forward and tighten up to line up shots on the forward leaning Flashman.

Both forces unleash hell.  The Blackhawk eats an AC20 slug to the right torso, losing a medium pulse laser and a heatsink in the process.  The Vulture is brutalized by accurate and concentrated fire from the Comstar forces.  Armor is slagged off in tons.  While the spread of damage is quite even, internal damage claims an SRM launcher and a hip actuator.

Return fire from the Clans is awful.  Shots go wide early and often.  Only a few shots land true only to find fresh armor.

The Blackhawk falls under the onslaught and is kicked in the leg.

Tukayyid - - 11Tukayyid - - 13

Tukayyid - - 14Turn 5 – Clans Win Initiative

The Clan Vulture digs deep and rushes the Comstar line.  He positions himself against the canyon walls and a perilous cliff edge to block off any possible forward movement.  Remaining Clan forces follow up behind and form a line to assault the Comstar forces.

The Blackhawk uses the initiative win to back off behind a rock formation to lick its wounds.  The Shootist and Black Knight position themselves as best they can while the Rommel plows forward hoping to find a ramp to join the battle at the top of the canyon.

The relative position of forces against the varied canyon terrain forces the Clans to split fire against targets of opportunity.

The MadCat and Cauldron-Born target the Shootist and slag armor but find no crits.  The Shootist replies back and lands an AC20 slug to the Cauldron-Born.  Staggered, the Cauldron-Born falls.

Leading the charge, the Vulture takes more damage scattered against its already battered frame.  A final shot manages to find both ammunition and engine criticals, silencing the great machine.

Tukayyid - - 15Tukayyid - - 16Tukayyid - - 17

Turn 6 – Inner Sphere Win InitiativeTukayyid - - 18

The Clans charge forward, maintaining a tight conga line facing the bulk of the Comstar forces in the top of the canyon.  By now the Shootist and Black Knight are circling back into the battle and collapsing into the flank of the charging Clan force.  Even the Rommel has located a suitable ramp (albiet further out of the way than desirable) to enable it to join the high ground.

The Cauldron-Born takes a ferocious pounding and slags off armor leaving only its center torso in decent shape.  A LRM launcher and an engine take critical hits.  The Black Knight lines up shots on the MadCat and finds a kink in the armor (TAC) in the left torso which ignites machine gun ammunition.  As a final insult to injury, even the Rommel scores a long range autocannon hit against the reeling Blackhawk.

The Clans focus all possible fire on the Flashman and decimate it.  The torso crumples and explodes under the deadly barrage.  Other opportunity fire targets the Crab and crits a shoulder actuator.

Tukayyid - - 19Tukayyid - - 20Tukayyid - - 21

Turn 7 – Clans Win InitiativeTukayyid - - 22

The Clans force the issue and continue to press against the Comstar forces.  In return the Comstar forces dance around and end up in a semi circle with guns at the ready.  The Blackhawk takes a chance and jumps behind the Shootist.

Comstar splits fire on the MadCat and Cauldorn born.  Weapons fire is on the mark and pummels the MadCat.  An AC20 slug at medium range is the last straw and sees the Clan ‘Mech crumple in a heap.  The Cauldorn-Born suffers a similar fate and succumbs to multiple criticals and a final ammo explosion.

The Clans rain fire into the Crab but somehow find only armor to slag off.  Both side torsos are crushed but the ‘Mech remains operational.

The Blackhawk suffers some damage from the Rommel while it unloads into the Shootist.  No criticals despite a few new holes in the Shootist’s rear.

Both the Crab and Shootist fall.  The Blackhawk takes the opportunity to kick the downed ‘Mech but finds only armor for his trouble.

Tukayyid - - 23Tukayyid - - 24Tukayyid - - 26Tukayyid - - 25

Turn 8 – Inner Sphere Win InitiativeTukayyid - - 27

Sensing the end, the Clan forces muster their final courage and stand their ground against the quickly enveloping Comstar forces.

The remaining Clan forces concentrate all fire power on the Shootist.  The Clan weapons finally seem to begin hitting their mark.  A double through armor critical combines for 4 torso criticals yielding a gyro and 3 engines.

Return fire from Comstar buries the Blackhawk.  The Huntsman is almost cored out leaving only a shell of a ‘Mech left standing.

Tukayyid - - 28Tukayyid - - 29Tukayyid - - 30

The End

At this point the game is called in favor of the victorious Comstar forces.  A great game with a lot of interesting interaction with the terrain.  The way the canyon dictated line of sight made for several very strategic moves by both sides.  I don’t think either of us expected such a tactical treat on such a map.

Congrats to my winning opponent and a well played game!

Posted under After Action Report
Mar-11-2015

Clan Invasion

Clan Invasion was played at TotalCon 2015 in Mansfield Massachusetts.  Thanks go to James Kirtley for providing the miniatures and terrain as well as running the game.

SITUATION

The Clan invasion has begun and an Inner Sphere company is caught in the crossfire.  The Clans have their sights on control of a hydro electric dam and the Inner Sphere defenders have rallied to its defense.  Can overwhelming numbers sway the battle in favor of the Inner Sphere for will the superior technology rule the day?

FORCES

All pilots for this battle have gunnery and piloting of 3/4.

The Inner Sphere

  • CN9-D Centurion
  • ENF-5D Enforcer
  • WLF-2 Wolfhound
  • WHM-7S Warhammer
  • DV-7D Dervish
  • VTR-9K Victor
  • PXH-3D Phoenix Hawk
  • AS7-S Atlas
  • LCT-3S Locust
  • VLK-QD Valkyrie
  • HCT-5S Hatchetman
  • AWS-9M Awesome

The Clans

  • Daishi Prime
  • Madcat Prime
  • Loki Prime
  • Vulture Prime
  • Warhawk Prime
  • Elemental Battle Armor x 5

The Battle Field and Deployment

The battle takes place at the site of a hydro-electric dam defended by the Inner Sphere.  The Clans deploy at the southern edge of the map and are the attackers in this scenario.

Dark green hexes are light woods.  Brown hexes are sand.

Clan_Invasion_03Clan_Invasion_02


Clan_Invasion_08Clan_Invasion_09

Turn 1 – Inner Sphere Wins InitiativeClan_Invasion_11 Clan_Invasion_13

The Clan units advance slowly keeping a relatively loose formation.

The Inner Sphere units inch up into better firing positions while keeping several of the lighter units back in reserve.

Long range weapons fire concentrates pot shots on the Atlas and Loki with minimal damage to each side.  Nothing but a few paint scratches.

Clan_Invasion_16Clan_Invasion_15Clan_Invasion_14

Turn 2 – Inner Sphere Wins InitiativeClan_Invasion_18 Clan_Invasion_19

The Clans form up on a line around a batch of woods while the Inner Sphere continues to hang back.

The Inner Sphere forces take long range shots on the MadCat and manage to scratch some armor but little else.

Return fire from the Clans concentrates on the Atlas.  An ERPPC obliterates the Atlas’ cockpit.  First blood to the Clans.

Clan_Invasion_25Clan_Invasion_24Clan_Invasion_21Clan_Invasion_23

Turn 3 – Clans Win InitiativeClan_Invasion_28 Clan_Invasion_27

The Loki and MadCat rush forward while everyone else drop most of the elemental units off.  The Daishi parks in the woods it is currently occupying and settles in for the battle.

The Inner Sphere, shocked at the sudden loss of their Atlas, start to look a bit flustered.  The light units begin to form up, possibly lining up a rush into the fray.  The remaining heavier units continue to park themselves for now, content to trade long range fire with the Clans.

The Inner Sphere concentrates fire on the MadCat.  Most shots miss but a few PPCs scatter damage around the torso.

The Clans line up shots on the Awesome and slag a few tons of armor away.  A lone shot hits internal on the left torso and manages two criticals; a heat sink and an engine.

Clan_Invasion_29Clan_Invasion_30

Turn 4 – Clans Win InitiativeClan_Invasion_33 Clan_Invasion_32

The Clans begin using their now deployed battle armor to sink initiative.  All remaining elementals are dropped this turn.  The Loki and Madcat move backwards after shedding their infantry.

The Inner Sphere begins to look frazzled and they lurch forward in a disjointed attack.

The Inner Sphere splits fire against Battle Armor and the Madcat while the Clans concentrate on the Victor.

One elemental bites the dust after a PPC and some LBX cluster shot.  Two PPCs land on the MadCat who shakes off the damage.

The Victor is brutalized by a hail of ERPPCs, ERLL, and UAC5 shots.  The left leg in particular is crushed by the barrage resulting in foot critical hit.  Against the odds, the Victor keeps his balance and remains standing.

Meanwhile the MadCat fails his own pilot check and falls down (rolled snake eyes!).

Clan_Invasion_40Clan_Invasion_36Clan_Invasion_41Clan_Invasion_34

Turn 5 – Inner Sphere Wins InitiativeClan_Invasion_42

The Inner Sphere light units begin to rush forward while the Elementals jump to meet them on the banks of the river.  Assaults and heavies creep forward beginning to be seem desperate to close the range and bring more weapons to bear.

The Madcat rolls snake eyes again and falls again.  The second try brings the Mech to its feet.

The Vulture and Loki fade back, seemingly content to dance back and forth keeping their long range weapons in range with a decent movement modifier.

The Inner Sphere concentrates fire on the MadCat with some secondary targets chasing Elemental units.  The Clans begin to argue about target selection and end up spreading shots around.  Elementals go after targets of opportunity.

Early shots on the MadCat miss needing mostly 10s.  A few long range weapons hit home and manage to concentrate damage on the left leg and right torso.  Damage goes internal but fails to hit anything important.  A lucky PPC hits the head and also fails to score a crit.

Secondary fire from the Inner Sphere obliterates two elementals and scatters damage on others.

The Clans return fire in dramatic fashion.  After taking some light damage from UAC5s the Phoenix Hawk is summarily head capped by a Large Pulse Laser from the Warhawk.  The Phoenix Hawk is notably one of the few designs that NEVER fields full head armor.

“Other than that Mrs. Lincoln, how was the play?”

The MadCat brutalizes the Victor after the Vulture and Loki mostly miss.  The left arm is shredded and lots of internal damage is dealt out but amazingly no critical hits.  Two squads of elementals fill in the holes with SRM fire and manage to find a box of ammo.  CASE saves what little remains of the battered ‘Mech.

The Victor and MadCat both fail their piloting checks and hit the dirt.  The Victor is left with no arms, no side torsos, and one remaining leg hanging on by a single point of internal structure.

Clan_Invasion_45

Turn 6 – Clans Win InitiativeClan_Invasion_46 Clan_Invasion_48

The Clan Loki and MadCat continue to dance back and forth.  The other Clan units are content to snipe from wooded positions and offer little movement.

The Inner Sphere Locust makes a long run, swinging wide of the main battle and is appearing to be trying to flank the Clan position.  The remaining Inner Sphere units bunch up along the waterline with some attempting to ford the river.  Elementals jump at the Inner Sphere units as they are slowed up by the terrain and begin making attacks on the Centurion and others.

The Inner Sphere opens up fire on the MadCat desperate to score a kill to get the ball rolling on their end.  Some shots are designated on the Loki and Vulture as well as numerous secondary targets on elementals.

The Clans continue to spread the love around and target the Awesome, Warhammer, Wolfhound, and Valkyrie.

Finally some decent hits start to come for the Inner Sphere who are able to slag a few tons of armor off of the MadCat.  The left torso is ripped open and the left leg is blown clear off sending the ‘Mech to the ground once more.  Unfortunately most of the big weapons fail to find the target and the MadCat is left alive able to prop and shoot next turn.  The Loki and Vulture come away mostly unscathed.

The Clans core out the Warhammer’s left torso and destroy a leg as well.  The first set of shots on the Awesome scratch the armor but do little to worry the massive assault ‘Mech.  As weapons fire finishes up, one last last ERPPC from the Loki hits the Awesome’s head, crushing the cockpit and silencing the great machine.

Elementals launch swarm and leg attacks on the Centurion but only succeed with the swarm attack.  The Centurion pilot begins to worry as the clatter of battle claws can be heard scurrying up his ‘Mech.

Clan_Invasion_56Clan_Invasion_55Clan_Invasion_52Clan_Invasion_50Clan_Invasion_57

Turn 7 – Inner Sphere Wins InitiativeClan_Invasion_58 Clan_Invasion_66

The Locust finally wades into the river well behind the Clan forces.  Another turn and the ‘Mech will be able to sprint into the Clan flank.  The Wolfhound, Centurion, and Enforcer rush forward to close the distance with the Vulture.

The Clan Loki and Vulture continue to dance back and forth satisfied with their progress so far in the battle.

Targeting for both sides devolves into targets of opportunity.  No focus firing or concentration is evident.

Weapons fire for the Inner Sphere is stunningly ineffective.  Scattered shots slag armor from multiple Clan units but no significant damage, internals, or criticals are reported.  A single PPC scores on the head of the Loki but no criticals result.

The IS Wolfhound is crushed under several withering volleys of ERPPCs and more.  The whole right side of the ‘Mech is destroyed.  The Victor gets a leg blown off by elementals.  Further damage results in no less than 6 center torso criticals.  The Valkyrie has its left torso and center torso cored out by a hail of fire from the Daishi and Warhawk.

The swarming elementals on the Centurion tear into the center torso resulting in two critical hits.  The engine and gyro are both hit once.

After a few players glance around the table it is agreed that it is safe to call the game at this point in favor of the Clans.

Clan_Invasion_64Clan_Invasion_62Clan_Invasion_59Clan_Invasion_60

The End

To say the least, it was a rough game for the Inner Sphere.Clan_Invasion_69

Perhaps the addition of Clan honor rules may have allowed the Inner Sphere to pick their battles more effectively or at least been able to buy them time to cross the river and have a chance.  The early loss of the Atlas also stung quite a bit and a few players lamented how a point or two of Edge may have been useful to iron out the randomness of head hits from Clan ERPPCs.

All the players I had a chance to talk to still had a good time and enjoyed slinging dice even when the odds seemed out of whack.  I was impressed with the setup and the miniatures provided. Looking forward to next year!

Posted under After Action Report
Mar-16-2013

The Dragon’s Fury, Fire and Smoke

3069 Luthien

The Jihad has erupted and Theodore Kurita lies in a coma.  In this time of Chaos the Black Dragons strike at the capital to seize control of the Combine.  When the Blakists arrive to help the question remains… help who?

This three faction battle was played at TotalCon 2013.  Many thanks go to the players and to the game master Mike Mahaney.

The Forces

The Black Dragons

  • Griffin – custom
  • Shadowhawk – custom
  • Wolverine 8C
  • Warhammer 8D

The Red Dragons

  • Firestarter OD
  • Grand Dragon 7K
  • Avatar OC
  • Charger C

Word of Blake

  • Crab 30
  • Raijin 101-C
  • Champion 3P
  • Bombadier 14C
  • Tessen

Dragons Fury - Setup

Turn 1Dragons Fury - Turn 1

The Red Dragons move cautiously on the western side of the map.  They appear unwilling to over play their hand so early in the game.  They use a local building for cover as they draw slowly closer to the opposing forces.

The Word of Blake takes a more daring start and rushes towards a small hill that stands between them and the Black Dragons.

The Black Dragons have a similar idea and use the hill to cover their advance.  The lone Warhammer lags behind and heads towards a slightly southern waypoint.

No weapons fire on this turn as there is no line of sight.

Turn 2Dragons Fury - Turn 2

The Word of Blake concentrate their force at the edge of the woods near the Black Dragons.  Their faster units vault onto the hill taking partial cover.

The Black Dragons respond by jumping into the edge of the woods being careful to not give up any easy shots.  The Warhammer is not quite separated (but still well in range of its PPCs) from the main Black Dragon force and makes his way slowly south-west.

The Red Dragons continue to creep closer using the hills and building as cover to stay out of sight.

In a surprising turn, the Word of Blake manages to cut out the Black Dragon Master C3 unit from the network ruining some otherwise juicy shots from the Warhammer.  Regardless the only damage dealt that turn was a large pulse laser hit on the Word of Blake Crab.  First blood to the Black Dragons.

Turn 3Dragons Fury - Turn 3

Perhaps deterred from their initial encounter the Word of Blake abandons the eastern hill and takes a western route along the edge of the woods towards the approaching Red Dragons.

The Red Dragons have now brought their tightly packed force into the fray and position several units within sight of the Word of Blake force.

The Black Dragons jump deeper into the woods keeping an equal distance between the two other forces.  The Warhammer continues to creep along at the southern edge of the map looking for shots.

The Black Dragons lack line of sight for any shots.

The Grand Dragon (Red Dragon force) takes some decent hits from the Word of Blake, but only loses some armor.  One head hit shakes up the pilot but he remains conscious.

Return fire concentrates on the Champion (RD player rolls to-hits of 12, 12, 12, 10 and 9!) and slags multiple tons of armor from the Word of Blake ‘Mech.

Turn 4Dragons Fury - Turn 4

The Black Dragon Warhammer finally makes it to his sniping post, a partial cover hill overlooking the bulk of the battle well in range of his PPCs.  The other Black Dragon units jump atop the center hill to confront the advancing Word of Blake.

The Word of Blake sends their faster units into the woods to harras the Black Dragons while the heavier units push the Red Dragon force preferring to stay at a modest range in doing so.

The Red Dragons continue to dance just out of reach and remains cautious about committing to the battle in earnest.

The Word of Blake open up on the Black Dragon Shadowhawk and Wolverine.  The damage is heavy but well spread across the available locations.  The Shadowhawk takes one head hit.

Dragons Fury - 09Dragons Fury - 08 Dragons Fury - 07

The Black Dragons concentrate fire on the Raijin and scores modest damage.  The Warhammer, despite decent to-hit numbers at range, manages to miss with everything.

The Red Dragons and Word of Blake trade shots at range and manage to only scratch up more armor in the process.

Turn 5Dragons Fury - Turn 5

The Black Dragons push hard with the Griffin and Wolverine while the Shadowhawk jumps back to take a breather.  The Warhammer stands still overlooking the battle.

The Word of Blake is now spread out but applying pressure on the Red Dragons who back up, seemingly unwilling to go toe to toe with the Blakists.  The Word of Blake Tessen boldly makes a run along the northern edge of the battle field to force action against the Red Dragon force.  The Raijin

stays behind to harass the Black Dragon force.

Dragons Fury - 11

The Red Dragon player general comments that their force is exercising a strategy of “cautious indifference” for this battle.

The Red Dragon force concentrates fire on the Word of Blake Tessen who wobbles under the barrage and is sent to the ground after a failed piloting skill roll.

The Word of Blake response is scattered and sheds modest amounts of armor from the Red Dragons.  The lone bright spot is when the Bombadier scores an impressive full LRM20 rack hit on the Red Dragon Firestarter which includes a head hit.

In a spectacular display of ineffectiveness, the Black Dragons miss every shot they attempt this turn.

Dragons Fury - Turn 6

Turn 6

The Word of Blake strongly pushes against the Red Dragons who finally respond in kind and plunge their unit into the fray.  Jumping ‘Mechs fly across and over opposing units looking for rear shots.  A fury of combat erupts near the north-western hill.

The Black Dragons perch themselves on the hills and at the edge of the woods to take shots at long range as they come.Dragons Fury - 16 Dragons Fury - 15

The Black Dragons concentrate fire on the Word of Blake Bombadier and slags armor away revealing the internal structure on the left leg.

The Red Dragons spread their attacks but the Champion takes the worst of it, losing all armor on the right leg (1 foot critical hit) as well as the right arm.

The Word of Blake takes a beating this turn and cannot muster up the die rolls to return the favor.  Lots of misses and missed opportunities in the now mostly short range brawl.

Turn 7Dragons Fury - Turn 7

The Red Dragon player reiterates their overarching strategy of “casual disinterest”.  Their units begin to jump away as they can and try to maneuver out of the grasp of the Word of Blake force.

The Word of Blake doubles down and continues to press on the Red Dragons while the Raijin guards the rear from the Black Dragon force.

The Black Dragons remain stoic on their respective hills.  Only the Wolverine ventures forward closer to the enemy to provide C3 spotting for his lancemates.

The Black Dragons concentrate fire on the Blakist Champion.  Right leg criticals cripple the ‘Mech and more armor is slagged away.  Another head hit adds to the punishment.  The ‘Mech would fall at the end of the phase taking another pilot hit in the process.

Dragons Fury - 21 Dragons Fury - 20 Dragons Fury - 19

The Word of Blake manages to riddle the Black Dragon Griffin with over 20 points of damage, shedding armor but failing to do any serious damage.

The remaining Word of Blake and Red Dragon units pour weapons fire into each other melting armor away by the ton.

In the physical attack phase the Word of Blake Tessen reaps some revenge and kicks off the arm of the Firestarter beneath him.

Turn 8Dragons Fury - Turn 8

The Red Dragons continue to pull back and are almost the the edge of the map.  The Black Dragons stay put in their sniping positions using the Wolverine to spot for their attacks.  The Word of Blake spreads out slightly while keeping all of their units within sight of the enemy.

In a surprise move, the Red Dragons send their Charger to charge the Word of Blake Bombadier.

The Black Dragons concentrate fire on the already battered Blakist Champion.  After two head hits, weapon criticals and blown off arms, the ‘Mech falls knocking the pilot unconscious and crippling the engine.

The Word of Blake Raijin and Black Dragon Wolverine are toe to toe and trade shots.  The Raijin suffers a head hit and has it’s SRM ammo crit’d causing the ‘Mech to go up in smoke.

Remaining Word of Blake ‘Mechs pummel the Red Dragon Charger but only manage to ding the armor of the mighty assault ‘Mech.

Remaining weapons fire is ineffective at dealing significant damage.

The Charger makes his piloting skill roll to remain standing after weapons fire.  Then the charge roll… misses! The Charger trips in the process and falls.

Dragons Fury - 33 Dragons Fury - 30 Dragons Fury - 29 Dragons Fury - 28

The End

At this point the convention slot was up and a winner was declared.  The Black Dragons managed to deal the most damage and took down two Word of Blake ‘Mechs and were declared the winner.

Posted under After Action Report
Mar-30-2012

City Fight

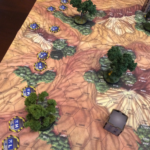
Across another war torn planet the forces of the Federated Suns and the Lyran Alliance collide in the densely packed corridors of a vital city complex.  Each faction needs to force the other out and claim the city for their own.

Davions

  • TLR1-0 A Templar (Gunnery 3 / Piloting 5)
  • RFL-8D Rifleman (Gunnery 4 / Piloting 5)
  • GRM-01A Garm (Gunnery 3 / Piloting 3)
  • GRM-01A Garm (Gunnery 3 / Piloting 3)
  • Striker Light Tank (Gunnery 4 / Driving 5)

Lyrans

  • ZEU-9T Zeus (Gunnery 3 / Piloting 4)
  • COM-5S Commando (Gunnery 2 / Piloting 3)
  • WLF-2 Wolfhound (Gunnery 4 / Piloting 5)
  • HCT-5S Hatchetman (Gunnery 2 / Piloting 3)
  • Bulldog Medium Tank (Gunnery 4 / Driving 5)

Turn 1Lyrans win Initiative

Both forces sprint towards the center of the map.  Due to the dense collection of buildings no shots are available for either force.

Turn 2Davions win Initiative

The sprinting continues as one of the Davion Garms begins to get close to the Lyran Commando who stays just out of view for the time being.

The Lyran Wolfhound does manage to line up a shot but the two Garms stay close and manage to get a two on one advantage for this combat round.

Luck was not on the Davions side who manage to hit with a single LRM10 doing minor damage.  The Wolfhound finds a kink in the armor and lands a through armor critical hit to the center torso of the lead Garm.  Two critical hits result in a severely damaged engine and a bad start for the Davions.

Turn 3Lyrans win Initiative

The Lyran Commando starts to get anxious and moves back, supposedly to a safer position but the speedy Garms both pounce moving to close range.  The Lyran Bulldog Tank moves in to support.

The Davion Rifleman jumps onto a nearby building with partial cover and a clear look over the battle.  The Lyran Zeus backs up to clear his own line of fire on the newly elevated RIfleman.  The Hatchetman jumps to support that Zeus and draws a bead on the Rifleman as well.  The Templar continues to inch forward unable to keep perfect pace with the faster units of his lance.

The Wolfhound hits solidly to the nearest Garm’s center torso.  The Commando follows up with a flurry of SRMs and manages to scrap into the center torso internal structure but fails to crit.  The Bulldog tank fires on the other Garm and pulverizes it’s center torso armor.  The Hatchetman lines up a medium range shot on the nearest Garm but can’t manage to hit.

The Rifleman revvs up the RACs for 3 shots each and lands two rounds on the Zeus’ right arm.  One of the Garm’s hits a slug round to the center torso of the Commando while the Striker tank slags the front armor of the Bulldog Tank with LRM fire.  The Templar misses completely.  Not a good turn for the Davions.

Turn 4Lyrans win Initiative

The Davions take quick action and use both Garms to trap the Commando in the narrow city streets.  The Lyran Wolfhound moves to support.  The opposing vehicles go toe to toe to trade shots.  The Zeus moves forward for a shot of his own while the Templar jumps to meet the Rifleman atop the heavy building making good use of the surrounding buildings for partial cover.  The Hatchetman is content to stalk the two heavier ‘Mechs and lurks just out of sight in front of them.

The Lyran Bulldog tank blows the wheels off the Striker tank with a lucky motive roll while return fire peppers the battered front armor but fails to penetrate.  The Wolfhound is beginning the overheat from near constant firing and judiciously holds back this turn and misses everything for his trouble.  The Zeus finally turns to pay attention to the Templar and Rifleman and lands a bunch of weapons fire but unfortunately much of it hits the building in front.  The Commando begins to gain an edge on the nearest Garm and tears through the wafer thin center torso armor and scores two gyro criticals.  Return fire misses while the other Garm turns towards the Zeus and hits with everything, scraping some armor off but doing little real damage.

The Davions roar back and the Templar and Rifleman gang up on the Wolfhound who manages to be just a slightly better shot for both.  The RACs on the Rifleman spew out 5 shots each and the combined firepower decimate the Lyran Wolfhound.  A double hit form the Templar’s UAC10 rip the Wolfhound’s right arm clear off.  Both side torsos are stripped of armor as well as the left leg which loses two leg actuators.  Amazingly, the Wolfhound makes all of his rolls and remains on his feet.

The Garm with the double gyro hit falls and the pilot hit causes the pilot to black out.  No matter, because the Wolfhound and Commando both kick and silence the battered machine.  The other Garm reaches back and sends two punches at the Commando and hits solidly scoring an engine critical hit.

Turn 5Lyrans win Initiative

The Lyrans line up to combine their firepower but missposition the Zeus who has no shots this turn.  The Rifleman and Templar stick together but are forced to give up their prime fighting position for fear of a building collapse brought on by enemy fire.  The remaining Garm retreats to safer ground but finds himself in sight of the Lyran Bulldog tank.

The Lyran Commando and Wolfhound combine fire on the Rifleman but only scratch at the thick armor.  The Bulldog tank targets the Striker tank in front of him and peels off more armor unable to crack through to the internal structure.

The Davions unleash hell on the Wolfhound and rip the right side to scrap.  The Wolfhound fails his piloting skill roll and is destroyed by the fall damage.  The Striker tank gets some revenge on the Bulldog and manages to finally score some critical hits, scoring hits on the commander and crew!  The Garm adds in one motive roll but cannot significantly damage the fresh rear armor.

The Hatchetman goes for a kick and misses!

Turn 6Davions win Initiative

The wounded Bulldog tank drives for cover, unable to shoot this turn.  A cluster develops in the middle of the city centered around the Hatchetman who can’t resist a generously offered rear shot on the Rifleman.  The recovering Garm squares off against the Commando a stones throw away.

The Davions concentrate their firepower on the Hatchetman and pummel the ‘Mech causing serious damage to the center torso and right leg.  Both sections are internal thanks to the fast firing RAC.

The Commando fires away with a full solvo of SRMs but only manages a single leg critical despite multiple other opening in the armor.  The Zeus and Hatchetman target the Rifleman and do serious damage to the center torso and right torso.  The last medium laser to score a hit finds the weakened right torso internal structure and touches off an ammo explosion that guts the ‘Mech from the inside.

The Templar tries to kick the Hatchetman but misses comically and falls to the ground.

Turn 7Davions win Initiative

The Lyrans set the trap for the Templar and put a ‘Mech on either side pinning him between the buildings.  The Templar makes the most of his situation and rushes towards the Lyran Zeus.  The Commando joins the party as the opposing Garm puts some distance between them to utilize its longer range weapons.

The Lyrans shooting this turn is horrible, made worse by a hot running Zeus.  The respite allows the Davion Templar to apply a little pressure and splits fire against the Hatchetman and Commando.  An SRM6 salvo beats up on the Commando causing two engine criticals dooming the 10 heat sink ‘Mech to a slow agonizing death.

The Zeus kicks the Templar but the Templar shrugs off the damage.

Turn 8Davions win Initiative

The Templar begins to jump towards safety and is harried by the remaining Lyrans.  Only the Hatchetman can line up a shot.

The exchange of fire does not go well for the ambitious Hatchetman.  The Lyran’s weapons find fresh armor more often than not.  The Templar opens up and scores major hits on the left leg and center torso opening up holes in each.  The Hatchetman loses one leg actuator but narrowly avoids critical hits to the torso.

Turn 9 to the End

The leg damage to the Hatchetman as well as the gaping holes in the armor force the medium ‘Mech to break off pursuit.

The Zeus lacks the jumpjets to make an honest chase.  The Templar continues to jump keeping buildings between him and his pursuers.  The Garm begins to make his move and uses his superior mobility to dart between buildings avoiding the healthier Zeus.

After a few ineffective parting shots both remaining Davion ‘Mechs make it off the battle field to fight another day.  The Lyrans secure the city and ready themselves for the next battle in a long war.

Posted under After Action Report
Sep-5-2011

Breaking and Entering

An elite strike force loyal to Devlin Stone has managed to infiltrate the Word of Blake Space Defense System (SDS) protecting the Devils Tower Castle Brian.  Their mission is to cripple the SDS by any means necessary.  Will they be able to locate the Command and Control and knock it out in time?  Or will the WoB defenders rule the day?

This game was played at Historicon 2011 and uses the A Time of War combat system.  Several modifications are in effect as well as redesigned record sheets more suitable for skirmish level infantry combat.

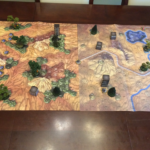
Miniatures are a mix from MERCS and Iron Wind Metals.  Terrain used is from World Works Games and was painfully constructed by Saxywolf and myself.  We used their TerrainLinx system to build the two level SDS.  I plan on having a full post describing the construction of the terrain later on.

Delvin Stone Loyalists

  • Heavy Weapons, MG
  • Heavy Weapons, Dual SMGs
  • Heavy Weapons, Man Pack Flamer
  • Assault Leader, Rifle
  • Assault Leader, SMG, Vibroblade
  • Soldier, Rifle
  • Soldier, SMG
  • Assassin, SMG, Vibrodaggar

Word of Blake Security Detail

  • Manei Domini Leader, Rifle and Vibroblade, Full Body Myomer
  • Manei Domini Assassin, Pistol, Vibrodaggar
  • Security Guard Captains, Rifles
  • Lots and lots of Redshirts, Pistol, Rifle

Prototype Record Sheets

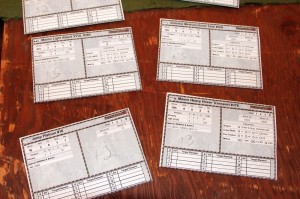
We used a new record sheet for this game and I’m glad to share a few examples with you.  I’m not 100% happy with the result thus far but it showed a lot of promise during the game.  A few more adjustments and it will be ready for prime time.

Breaking In

Our adventure begins with the group of loyalists already inside the SDS.  A compromised set of security codes helped them gain access.  Standing in the opening hallway they are undetected… for now.

The main door towards the elevators to the lower level is blocked by a hardened security door.  The security code they have doesn’t work.  The team has to find another way through.

Instead of splitting up, the team decided to stick together and makes a right turn into what appears to be a barracks or living area.

The Barracks

The team fans out and attempts to sneak into position.  As luck would have it, the Assassin is the first to fail a stealth skill check and alerts a nearby guard of their presence.  The hapless guard peeks out his door and gets a bullet through the eyes for his trouble from one of the Soldiers in the back of the room.

The Soldier did not have a silenced weapon though and all the rest of the guards in the room go on alert and draw weapons.

As the guards pile out of their comfortable quarters, they are gunned down by numerous concentrated volleys from the Loyalists.  The team fans out and secures each room in sequence leaving no witnesses.  The team recovers fatigue, reloads and positions themselves to advance through an adjoining long hallway.

Corridor A

Two guards are chatting about halfway down the hall.  The assassin takes a quick peek to setup a shot but again fumbles his Stealth check and the two guards turn to attack.  One fires away while the other runs backwards and around a corner for better cover.  The guard that stands and shoots is quickly gunned down and the team moves up to take positions at the open door.

A strong perception check alerts even more guards in the room on the opposite side of the hallway.  Five more guards rush into the fight and take cover in the small L section of the hallway out of sight for now.

The assault team moves into the hallway, forsaking cover to lay down a wall of suppression fire at the corner of the hallway.  Two guards test their luck and move for a shot but win the bullet catching contest.

The Loyalist assault leader readies a grenade and rushes up to the corner after suppression fire dies down.  A quick reflexed guard at the corner sneaks off a double shot and hits twice.  The point blank shots rip through the Assault Leader’s armor and kills him.  And then there were seven.

The Loyalists take no chances now and spray the area with suppression fire again.  As one of the guards readies a grenade of his own the team seizes the initiative and overtakes their position gunning down everyone in their way.

Corridor B

Meanwhile in the other attached hallway a set of guards lie in wait alerted by the noise of gunfire close by.  As the team attempts to move in, they are greeted by several volleys of suppression fire.  As one guard lays down cover the other edges closer for a potential kill shot next turn.

Sensing the danger, the Heavy Weapons wades into the suppression fire, taking a hit in the process, but manages to stay on his feet (thank you pain resistance…) long enough to shoot up the near guard.  The assassin and dual wielding Heavy Weapons back him up and pummels the other guard with longer ranged gun fire.

Searching the Area

With the hallways clear, the team once again reloads and restores fatigue.  The room at the end of Corridor A appears to be an armory of sorts.  There are plenty of HE and AP mini grenades, TK Assault Rifles and plenty of associated ammo that won’t fit most of the team’s weapons.

The other hallway is a security room.  The assassin goes to work and unlocks the video feed to all of the security cameras.  Green markers are placed on the map to represent guards that are not yet alerted.  The next task is to disable the lock on the hardened door blocking their way to the elevators.  The Assassin fumbles his skill check and the door remains stubbornly locked.

Moving Back

The security and armory are dead ends so the team moves back to the main entrance.  As they make it to the door a frustrated guard opens the security door to take a pot shot at the incoming team.  His shots miss and the Assault Leader lays down suppression fire wounding the closest guard but failing to hit a guard further behind.

More guards from an adjacent room begin to threaten as they take up positions behind their closed door.  The team is caught in a tricky balancing act trying to cover two directions at once!  Overlapping suppression fire and overwatch actions do the work and prevent the guards from overwhelming them.  As the rest of the team moves into position the pressure subsides as more guns in the area make it easier to divide up tasks.  With the security door unexpectedly open, the team can push towards their objective but not without coving their flank from potential attacks from alerted guards in unexplored rooms.

Moving On

With their teammates covering the rear the two Heavy Weapons shuffle down the main corridor spewing lead.  The guards manage to sneak a shot onto the MG Heavy who shrugs off the damage and mows them down to the last man.

With the way clear the team peels off the rear guard one by one and moves into the large center room which happens to be an infirmary.  After numerous perception checks by almost all members of the team they end up finding less than useful supplies.

The Assassin takes the lead now and makes his stealth check turning the corner on a pair of guards.  With the drop on them both he primes a grenade and gently rolls it between their feet.  BOOM!!!  No more guards.  The team gains access to the elevators and pushes the button to go down.

Second Level

As the elevator door opens the MG Heavy Weapons unloads a fierce volley into two unwitting guards who dodge most of the long range shots and trade bullets with the team for a turn before being done in.

The team moves aggressively down the long hallways and use copious amounts of suppression fire to clear the way.  There are two doors to the SDS control room.  The team splits up to cover both doors while the guards inside scurry around to take positions to ambush.  The players then notice a curious looking barrel of potentially volitile contents.  With two teammates on overwatch covering the door they roll the barrel into place in front of the left door.

After taking cover, they pull the pin on a grenade and toss it on the barrel.  The resulting explosion kills two guards outright and blasts the door into bits.  On cue, the team at the other door burst through and lay down cover fire.  The hapless guards can do nothing but flail about and get shot up.

Easy Street

As the team makes entry the door to the center of the SDS flashes open and a Security Guard Captain pumps a burst into the chest of the Dual SMG Heavy Weapons.  Another Captain peeks out the other door and sprays a suppression fire action into the tightly grouped Loyalist squad approaching from the right door.

The Flamer and MG Heavy Weapons both take hits as well as the Soldier.  The Soldier is KO’d, the Flamer starts to bleed from a wound and the MG can’t keep his footing and falls to the floor.

Return fire from the Dual Wielding Heavy knocks down and bleeds one of the Captains.  The Manei Domini Assassin moves into the fray from the doorway but misses both of his shots.  The Loyalist Assassin returns the favor and hits solidly, causing a fortunate KO.

The Manei Domini leader now moves into view and lays down another pattern of suppression fire covering the team coming from the left door.  Every one of the Loyalist Assault Squad is now inside a suppression fire area of effect and cannot act without first potentially getting shot up!

The Dual Heavy Weapons tries to break the suppression fire but takes more wounds in the process and now takes a stun as his Pain Resistance has reached it’s limit.

In a desperate act the Soldier near the left door primes a grenade and chucks it wildly at the Manei Domini Leader.  The throw is awful and manages to bounce off a wall and BACK into the Loyalist squad.  The explosion kills the Assassin, mortally wounds the Heavy Weapons and mildly damages the Soldier who threw it.  Lesson learned, try to throw grenades from the FRONT of a group of friendlies and never from BEHIND them.

Redemption

Things are looking grim when the Man-Pack Flamer Heavy Weapons avoids the numerous suppression fire rounds and pours plasma onto the Manei Domini and the Security Captain.    The Captain is put out of commission while the MD Leader is stunned and bleeding.  The suppression fire trap is broken and the remaining Soldier, Assault Leader, and Flamer Heavy Weapons move in to finish off the wounded Word of Blake troops.

With the Word of Blake forces defeated, the remaining Loyalist force takes control of the SDS and makes contact with the anxious leadership topside.  The SDS is down and the invasion can proceed!

Posted under After Action Report
Jul-30-2011

Hold the Line

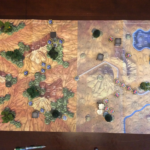
This game was played at NJCon 2011 in Somerset NJ.  Thanks go to Jim “RatBoy” Williamson for hosting the event and making a great game.  The game used the QuickStrike rules available in Strategic Operations.

Jim debuted a new record sheet creation that proved very useful and helped to keep the game moving.

Hold the Line

The Initial Word of Blake operations on Terra were carried out by Blake agents already on planet – most notable the so-called Shadow Lancers. ComStar headquarters on Hilton Head Island was perhaps the most important target assigned to the Lancers. While Lancer BattleMech forces dealt with the two battalions of the Com Guard 201st Division at Salina, the Lancer’s armor forces struck Hilton Head. Advancing under the cover provided by bad weather that covered much of North America, the unit had traveled to within 50 kilometers of the Hilton Head HQ before the defending Com Guard forces detected it.

With their computer and communications sabotaged by the Word of Blake, the Com Guard forces were unable to prevent the Lancers from crossing to the island and seizing control of the city of Hilton Head. At the first Circuit compound, however, the Com Guard forces rallied and made their desperate stand.

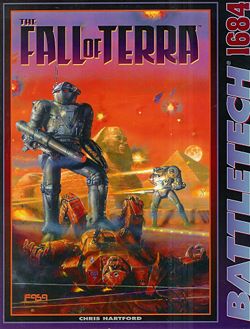
You can read more about this battle and the rest of the war for control of Terra in 3058 in the Fasa scenario book, The Fall of Terra.

Comstar

Flight of Arrows II – Lambda

  • Mantis Light Attack VTOL
  • Mantis Light Attack VTOL
  • Hunter Light Support Tank
  • Hunter Light Support Tank
  • Striker Light Tank
  • Striker Light Tank

Great Resistance II -Iota

  • Scimitar Medium Hover Tank
  • Scimitar Medium Hover Tank
  • Maxim Heavy Hover Transport
  • Jump Laser Platoon
  • Maxim Heavy Hover Transport
  • Jump Rifle Platoon

Word of Blake

Assault Lance

  • Scimitar Medium Hover Tank
  • Scimitar Medium Hover Tank
  • Patton Tank
  • Patton Tank

Support Lance

  • Blizzard Hover Transport
  • Blizzard Hover Transport
  • Myrmidon Medium Tank
  • Myrmidon Medium Tank

Recon Lance

  • Pegasus Scout Hover Tank
  • Pegasus Scout Hover Tank
  • Galleon Light Tank
  • Galleon Light Tank

Objectives

The Word of Blake units must exit off the opposite side of the battlefield with at least 50% of their units surviving.  The ComStar force must stop the Word of Blake forces at all costs.

Turn 1Comstar wins Initiative

Comstar begins the game deployed as far into the map as allowed but remain concentrated in the center.  The Word of Blake begins more spread out with the Patton tanks to the far North to evade attention.

The battle begins with each force advancing predictably across the map.  Only medium range shots are available to either side.

Comstar forces concentrate all fire on the lead Galleon Tank but only manage to hit once.  The Word of Blake return fire and astonishingly manage to destroy a Scimitar.  First blood goes to the Word of Blake!

Turn 2Comstar wins Initiative

The middle of the battle becomes a mess as the forward Comstar elements and Word of Blake hovercraft converge.  Comstar VTOLs flank behind the hovercraft for rear attacks.

The damaged Galleon from last turn and a Blizzard Hover are destroyed by Comstar.  The second Galleon is lightly damaged as well.  The Word of Blake concentrates on both Striker Tanks, killing one while the other survives due to bad rolls.

To the North, the Word of Blake Patton tanks move at flank speed safe from harm for now.

Turn 3Word of Blake wins Initiative

The injured Word of Blake Galleon seeks refuge in nearby woods while the faster hover units sprint past Comstar defenses.  The slower Word of Blake tanks creep up as fast as their treads will carry them.

Comstar forces hold the line in the center while breaking off select forces to hunt the Galleon and Myrmidon tanks.  The Comstar VTOLs keep their speed up and move behind the out-maneuvered Blizzard hover tank which is destroyed in short order.

Comstar forces make good use of the turn and strip the armor from one Myrmidon and slightly damage the other.  No shots against the Galleon Tank find their target.

Return fire is concentrated on the Hunter tanks which each take strong damage.  The lead Hunter Tank has a crew hit criticals inflicted but lives to fight another turn.

Turn 4Word of Blake wins Initiative

The Word of Blake tanks in the center of the battlefield dodge into woods for cover.  Hover forces remain on the field but at long range.  The Patton tanks continue at flank speed across the North edge of the battle.

Comstar forces surround and attempt to trap enemy tanks where possible.  Several short range and rear shots are made possible.

Comstar does a lot of missing this turn and only manages to scrape armor off the healthier Myrmidon.  All other shots miss.

The Word of Blake strikes back and destroys a Hunter Tank.  Both VTOLs are hit this turn, one of which is killed outright.  One of the shots was made at long range from the Word of Blake hover tanks far across the battle.

Turn 5Comstar wins Initiative

The Word of Blake is taking no chances and exits one hover tank off the map while three more lurk close to the objective edge.  The remaining tanks make best speed and dance between cover hoping to spread out the defending Comstar forces.  The Patton tanks are perilously slow as they weave around terrain to the North.

Comstar ends up giving chase to the Galleon tank with the one remaining VTOL and two supporting tanks.  Remaining forces try to anticipate Word of Blake movement and end up with poor shots.

Luck begins to shine again on Comstar who manage to destroy the Galleon Tank and one of the injured Myrmidons.  Return fire from the Blakists is ineffective.

Turn 6 – Word of Blake wins Initiative

The Word of Blake moves three more hover tanks off the objective edge while remaining tanks move as quickly as possible.  The last Myrmidon attempts to stay covered by woods as the Patton tanks continue their slow march.

Comstar is running out of available targets and swarms on the Myrmidon tank which is destroyed under a massive barrage.  The Word of Blake does not manage to deal any damage in return.

Turn 7 – Comstar wins Initiative

The last two Word of Blake tanks throw caution to the wind and give up rear shots as they frantically rush towards the edge of the battle.  Comstar forces converge with all forces and fire with everything in range.

Word of Blake shots miss badly.  Comstar forces combine fire and whittle away armor until a lucky strike finds the ammo bins sending the first Patton tank up in smoke.

Turn 8 to the End

The last Word of Blake Patton tank pushes towards the objective edge but is surrounded by adversaries which pummel the vehicle until it is reduced to scrap.

  • Word of Blake: Exited the battle with 4 live units (33%)
  • Comstar: Destroyed 8 units (66%)

Victory to Comstar!

Posted under After Action Report
Jun-8-2011

Stirring the Hornet’s Nest

This game was played at Cold Wars 2011 in Lancaster, Pa.  Thanks go to Scott “Wemic9” for hosting the event and doing so on short notice due a mishap of my own.  Standard BattleTech rules are in effect for this fast and furious battle for the power of the bottle!

Stirring the Hornet’s Nest

Rumor has it that some backwater bumpkins have developed the best whiskey in the galaxy and it’s worth more than can be imagined on the black market.  This is the raid for you and your pirate brothers.  Get in, take out the local defenders, and take the reported shipment of booze that is being prepped for shipment off-world.

In and out, easy job.  No problem. These hicks won’t know what hit them.  Heck, the only two things that these rednecks can do is make whiskey and race on the weekends.

Pirate Raiders

  • WTH-2 Whitworth
  • VND-5L Vindicator
  • PXH-3D Phoenix Hawk
  • JR7-D Jenner
  • CLNT-6S Clint
  • BJ-1 Blackjack
  • PNT-10K Panther
  • TR1 Wraith
  • WVR-7M Wolverine
  • END-6J Enfield
  • COM-1B Commando
  • WLF-1 Wolfhound

Planetary Militia

  • HNT-151 Hornet (Red)
  • HNT-151 Hornet (Blue)
  • HNT-151 Hornet (Green)
  • HNT-151 Hornet (White)

Objectives

The Pirate forces are searching for a cache of Whiskey.  The Whiskey is hidden in one of the warehouses inside the city gates.  The Militia player secretly selected a building to hold the booze.  The Pirate player must find the Whiskey, load it onto a ‘Mech and escape off the map.  The Militia must stop the Pirates at all costs.

Turn 1 Pirates win Initiative

The start of the game is a bit boring.  The Militia Hornets are spread out and hiding behind buildings.  The Pirate horde marches ominously forward, no doubt counting their lucky stars that the planet is so lightly defended.

Easy money!

Turn 2Militia win Initiative

The Pirates continue to move forward in two main groups.  The Hornets continue to hide but manage to let loose a few volleys of LRMs all of which miss.

Turn 3Pirates win Initiative

The Pirates are now at the gates of the city.  The lead units, a Phoenix Hawk and a Commando are shot at with LRMs but only the Commando takes any damage.  Return fire from the Pirates is ineffective.

Turn 4Pirates win Initiative

As the Pirates push into the city the Militia back off and find better cover further away from the attackers.  The first warehouse building is scanned by the Pirates.  Nothing yet.

Then suddenly, a lance of Savannah Masters burst out of one of the warehouses to the North!

One of the fearless hovercraft pilots charges the Pirate Commando while the others pour in laser fire.  A Pirate Wraith blasts the charging hovercraft before it can do any damage.  The medium laser barrage manages to critically hit one of the Commando’s engine slots.

Turn 5Pirates win Initiative

The Pirates fan out at best speed to cover as many warehouses as possible.

Suddenly a buzz is heard across the battlefield as a horde of hover fans turn on.  Three Gabriels and 17 Savannah Masters burst from their hiding spots to envelop the attacking Pirates!

The mass of hover tanks concentrate fire on the Wolfhound, Commando, and Clint while the Pirates lash out at targets of opportunity.

The Wolfhound is crushed from behind.  After a gyro hit the Wolfhound is almost brought down when its rear armor fails.  The Commando loses a few heatsinks and takes an engine critical but is alive for now.  The Clint sees a whole lot of armor peeled off but stands through the punishment.

In return fire a lucky strike from the Wolverine critical hits one of the Hornet’s ammo slots sending the ‘Mech to the scrapyard.

In a stunning turn the whiskey is located by the Wolfhound!

Turn 6Pirates win Initiative

The Pirate force is stunned by the sudden influx of hovers and moves three ‘Mechs to surround the whiskey stores.  The hovers scatter to maintain top speed while the Pirate Wraith stalks them with it’s pulse lasers.  A Hornet manages to get behind the Pirate Phoenix Hawk.

The hovers concentrate fire on the Wraith, Whitworth, and Clint.  The Pirates again fire at whatever hover craft are in range.

All told four hovers were cored, kicked or otherwise dispatched by the Pirates.  Return fire slags some armor but the Pirates keep their backs to the buildings to maximize protection.

One of the Hornets together with a couple hovercraft attempt to blow up the Whiskey! Their concentrated fire power is enough to take the building down a notch but is not enough to punch through to ignite the booze.  The Pirates successfully load up their precious cargo at the end of the turn.

Turn 7Pirates win Initiative

The Pirates use their initiative advantage to pick their lanes and begin moving units towards their home edge.  The Pirate Enfield, who is carrying the booze, moves last and dekes his way behind a building away from most of the danger.

The Pirate Commando is ganged up on and is cored through by a Hornet and a trio of hovers.  The Wolfhound is destroyed by engine criticals.  Both the Whitworth and Phoenix Hawk fall due to damage.

In return, three hovers die a sudden death by a combination of lucky weapon hits and kicks.

Turn 8 – Militia win Initiative

The Pirate force consolidates their force and seeks cover from a nearby building.  They strategically place their backs to the wall to avoid rear shots.  The hovers envelope the Pirates while keeping their speed up.

The Green Hornet is cored while two hovers are destroyed.  Another hover is immobilized and then killed by a sword attack from the Pirate Vindicator.  The hovers damage armor on the Wraith, Enfield and Jenner but do no major damage.  The Jenner misses a kick and falls flat on his face.

Turn 9 – Militia win Initiative

Time is running out and the Pirates can’t afford to make a run for it!  Its a final stand.

(our time slot at the convention was running out)

The Pirates put their backs to the wall again as the hovers swarm around them.  The Pirates scatter their fire at available targets while the hovers concentrate all fire on the Enfield!

Pirate weapons fire brings down no less than four hovercraft.  The hovers brutalize the Enfield, stripping armor in several locations.  The Enfield loses two engine criticals, a gyro hit and loses a number of weapon systems but manages to stay alive and upright.

End Game

Unfortunately, our time slot ran out and we were not able to completely finish this game.

So, who do you think would have been able to pull off the victory?  Do the Pirates have enough gusto to put the Militia in their place or will the stalwart defenders of the greatest vice in the Inner Sphere have the last word?

Regardless, this was a fun and spirited game.  My hat goes off to Scott for having the twisted mind to put it all together.

Posted under After Action Report
May-22-2011

The Fall of Terra: When the Bough Breaks

This game was played at NJCon 2011 in Somerset, NJ.  Thanks go to Jim “Ratboy” Williamson for hosting the event sponsored by Time Warp Comics & Games.  The following scenario is based on ‘Scenario 2: When The Bough Breaks’ from The Fall of Terra.  Standard BattleTech Quick-Strike rules are in effect for this fast and furious battle for escape!

The Fall of Terra: When the Bough Breaks

Salina, Kansas, North American Continent 1400 Hours, 28 February 3058 The two Comstar Com Guard Battalions stationed at Salina were designated by the Word of Blake as the main security force for the North American continent.  Neutralizing the Salina facility and its troops became imperative for the Word of Blake forces once they had attacked and taken the Hilton Head compound.  Although they enjoyed numerical superiority, the WoB Lancers would take horrendous casualties in a direct assault, and so they settled on a less direct course of action.

As the Lancer ‘Mech regiment encircled the base, a pair of Lancer fighters approached the base and requested emergency landing clearance from the unsuspecting defenders.  After receiving permission to land, the fighters began standard landing approaches, then suddenly pulled up and dropped a pair of J91 Fuel-Air devices on the base.

The resulting blast destroyed the Salina command structure and killed or injured almost half of the facility’s combat ready troops.  Realizing they would be crushed by the surrounding WoB forces, a number of junior officers rallied together and ad-hoc command to lead lead their troops through the Lancer regiment.

Word of Blake: Shadow Lancer, 2nd Battlemech Battalion

Assault Lance (65 pts)

  • Phoenix Hawk PXH-4L(19 pts)
  • Warhammer WHM-7M (15 pts)
  • Goliath GOL-3M (15 pts)
  • Thunderbolt TDR-9M (16 pts)

Pursuit Lance (44 pts)

  • Panther PNT-9R (8 pts)
  • Crab CRB-27 (12 pts)
  • Raijin RJN101-A (14 pts)
  • Wolfhound WLF-3S (10 pts)

ComStar: Com Guard 201st Division, Alpha and Beta Battalions

1st Provisional Lance (70 pts)

  • Grasshopper GHR-5J (19 pts)
  • Marauder MAD-5M (15 pts)
  • Awesome AWS-9Q (19 pts)
  • Black Knight BL-9-KNT (17 pts)

2nd Provisional Lance (44 pts)

  • Raijin RJN101-A (14 pts)
  • Mercury MCY-99 (6 pts)
  • Bombardier BMB-12d (15 pts)
  • Owens OW-1C (9 pts)

Objectives The Com Guard forces are attempting to escape from the encircling WoB forces.  The ComStar force must exit as many units as possible off the other side.  The Word of Blake forces are the last line that can put an end to the Com Guards before they can regroup and refit.

Special Conditions

Blizzard conditions made weapons fire a more difficult, but allowed ‘Mechs to overheat to do more damage without penalty.

Unit Cohesion practiced by the WoB Shadow Lancers prevents units from straying too far from their closest lance mate.

The Com Guard 2nd Provisional lance was late to the party, entering combat on turn 2.

Turn 1 – WoB wins Initiative

The Lancers lie in wait having lined up across the hilltops with the pursuit lance to the right and assault lance to the left. Com Guard’s 1st Provisional Lance enters the combat zone generally headed towards the Lancers’s pursuit lance keeping some woods between the two forces.  The Mercury of the 2nd Provisional Lance moves quickly ahead.

A few pot shots are taken by both forces over the trees to and from the hill top, but at such a long range nothing connects.

WoB: 0; ComStar: 0

Turn 2 – WoB wins Initiative

The Com Guard Grasshopper enters the combat zone with the remaining 2nd Provisional Lance, but breaks away from the main force to hide in the far woods to the WoB’s left to draw WoB units.  The Raijin and mercury take cover in the woods as the Owens moves to catch up to the Mercury while the heavier units slowly advance together.

The WoB Assault Lance advances toward the main ComStar group.  While the Crab advances to bring its weapons into range the Wolfhound advances to add pressure.

The Raijin and Panther aim carefully from their perch on the hill, but still their long range shots go wide.  Return fire does the same.

WoB: 0; ComStar: 0

Turn 3WoB wins Initiative

The Com Guard’s heavy units continue to advance while their lighter units take cover in or behind trees. The Grasshopper slowly advances through its own tree cover.

The WoB Pursuit Lance lunges forward as the slower Assault Lance takes cover in the woods to fire on the oncoming assailants managing to slough off much of the Black Knight’s armor.   Combined Com Gaurd fire begins to whittle down the Warhammer’s Armor.

WoB: 0; ComStar: 0

Turn 4WoB wins Initiative

The Com Guard’s heavy units are separated as some take cover in the woods and others stay out of close range to provide fire support with a greater firing sweep.  The Grasshopper advances to flank the WoB from the far side and although the Mercury is already far behind the WoB line, it does not leave the combat zone just yet.

The WoB Phoenix leaps forward into the fray as the Thunderbolt advances.

The pursuit lance lines up on the Marauder and Black Knight, but their shots are wasted on the Black Knight destroyed by their heavier counterparts and fail to find the Marauder through the trees.

Out in the open, the Thunderbolt loses most of its armor while the Raijin has all its external armor stripped away in one shot. Meanwhile, the Warhammer and Goliath put a hurtin’ on the Awesome, but in return, the Warhammer’s structure is critically hit nearly immobilizing it.  The Owens damages the Wolfhound from the rear.

Engaged in point blank combat, the WoB Phoenix Hawk and Com Guard Raijin kick at each other.

WoB: 5; ComStar: 0

Turn 5 – Com Guard Wins Initiative

With it’s faster units having moved around the advancing WoB defense line they now take up positions on the hills where the WoB originally awaited the Com Guard.  Some of the heavier units even fall back to take up firing positions to completely surround the WoB.

The WoB is forced to take cover where ever they can.  Retreating to the woods it just left, the armorless Thunderbolt has it’s head excised anyway, but not before it can concentrate fire with lance mates to deal heavy damage to the Awesome.

Caught in the open the Mercury damages the WoB Raijin’s weapon and leaves very little of the structure.

The skilled Marauder pilot fires on the Panther crippling it’s movement while doing the same to the Wolfhound with a swift kick, single handedly handicapping the Pursuit Lance’s pursuit capability and leaving their structure hanging by threads as well.

WoB: 5; ComStar: 2

Turn 6Com Guard wins Initiative

The WoB’s near armorless Warhammer remains in position with nowhere to hide hoping to project its fury one last time while the Goliath advances to pressure the Com Guard force.  Getting the drop on the WoB, the Marauder and Raijin take up positions behind the Goliath and Warhammer respectively. The WoB Phoenix manages to maneuver into position behind the Bombardier and Awesome.

After damaging the Marauder, the Warhammer succumbs to solid blows from the Raijin’s weapons and a kick.  The furious Goliath pilot mule-kicks the Marauder who returns the favor.

WoB: 10; ComStar: 4

Turn 7Com Guard wins Initiative

Taking cover on the edge the nearby woods to maximize its fire arc in the direction of the ComStar’s objective, the Bombardier instead moves behind the WoB Phoenix hawk.  The WoB Goliath moves to nearby cover where the majority of the decimated Pursuit Lance remains.   The Com Guard Raijin and Marauder take the opportunity to advance toward freedom while moving away from the remaining WoB forces.

The Mercury and Owens, playing it safe, leave the combat zone.  Concentrated fire from both the Marauder and Bombardier is enough to fell the Goliath.

WoB: 10; ComStar: 13

Turn 8WoB wins Initiative

The fresh Crab decides to pursue the heavily damaged Marauder while the Phoenix Hawk hops to another firing position as the Bombardier takes its place.  The lighter ‘Mechs remain in cover or avoid damage by staying out of range.

As the slower Grasshopper nears its objective, the Com Guard Raijin takes the opportunity to stick its head out to dent the Crab’s fresh armor.   Weapons fire damages the Bombardier, but return fire completely misses.

WoB: 15; ComStar: 18

Turn 9WoB wins Initiative

The Phoenix Hawk joins the Crab in pursuit of the Marauder as the Bombardier moves backward.  The WoB Raijin moves into a safe position to follow the Crab.   The Com Guard units take up defensive positions as they move around the WoB’s defensive line.  All shots miss.

WoB: 15; ComStar: 18

Turn 10WoB wins Initiative

The Phoenix Hawk and Crab come out of cover to continue their pursuit of the Marauder as their Raijin comrade follows carefully.

The armorless WoB Raijin gets a lucky shot on the Bombardier while avoiding incoming fire.  The Grasshopper and Rajin combine fire to turn the Crabs armor to molten slag.  The Marauder and Crab then assure each others destruction.

WoB: 15; ComStar: 18

Turn 11 – WoB wins Initiative

As the WoB Phoenix Hawk takes a forward firing position the Raijin moves away to cover.   Nobody finds their target.

WoB: 15; ComStar: 18

Turn 12 – WoB wins Initiative

The Phoenix continues to nag at the Bombardier’s armor while the Raijin once again cautiously advances.  The Panther slowly moves toward it’s lance mate while remaining far away from the enemy threat.

WoB: 15; ComStar: 18

Turn 13 – WoB wins Initiative

The WoB Phoenix screams toward the retreating Bombardier as the armorless Raijin risks leaving cover to strike at the Bombardier.

The Phoenix lands a hit on the Bombardier, but a solid blow comes from the Raijin which is more than enough to crumple the Bombardier’s structure.

The ComGuard isn’t so lucky not finding a single hit of their own.

WoB: 20; ComStar: 18

Turn 14 – WoB wins Initiative

The Com Guard Grasshopper and Raijin begin to withdraw taking cover from the advancing WoB.

WoB: 20; ComStar: 18

Turn 15 – Com Guard wins Initiative

The Com Guard Grasshopper and Raijin escape WoB’s grasp… for now.

WoB: 20; ComStar: 28

Aftermath:

A marginal victory for the Com Guard 201st.

Of the 40 ‘Mechs and vehicles in the Com Guard force at Salina, only 22 ‘Mechs made it through the encircling WoB Shado Lancer’s line.  These survivors fled west, hoping to reach one of several Com Guard supply depots in the Rocky Mountains.  However, a number of Lancer units moved to pursue them, and the chase was on!

Posted under After Action Report
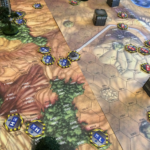
Apr-29-2011

Bad Intel

This BattleTech infantry skirmish game was played at HMGS Cold Wars 2010 using the A Time of War combat ruleset.  Thanks go to Demo Agent “Speck” for allowing the ScrapYard to host the game and to the participants for giving the game a try.

The battle proved extraordinarily fast as the players wasted no time getting right to the business of shooting each other to bits.  Read on to see how it all went down!  Please keep in mind while reading that this game featured modifications to the core rules that are documented in an earlier post.  Miniatures for the game are from the MERCS line of dynamic gaming miniatures.

Bad Intel

The company spooks have dug up verifiable information on a potential Star League era weapons depot.  The location is too fragile to risk sending in ‘Mechs to clear it so it is up to the infantry to sniff out the prize and secure it for evac.  Bad news is, the enemy knows as much as we do and are sending in their own forces.  Lock and Load in this ‘A Time of War’ Infantry Combat Scenario to claim the objective before your opponent!

Objectives

In the middle of the battlefield is a downed BSW-X1 Bushwacker.  A data package has been left behind that holds the coordinates to a potential weapons depot.  That data must not fall into the hands of the enemy.

Downloading the data package is accomplished by moving a character into base contact with the side of the downed ‘Mech near the cockpit.  The download occurs automatically at the end of the turn.  After downloading, the data must be exited off your own team’s map edge.

Liao Assault Squad

  • Squad Leader, Auto Rifle and Vibro-blade
  • Sniper, Minolta 9000
  • Soldier, Imperator SMG x2
  • Heavy Weapons, Dual wielding SMGs

Davion Assault Squad

  • Squad Leader, Auto Rifle
  • Sniper, Minolta 9000
  • Soldier, Imperator SMG
  • Heavy Weapons, Federated Barrett
  • Heavy Weapons, Man-pack Flamer

Turn 1

The first turn sees all characters sprint their full distance towards the middle of the battle.  Opposing snipers take up positions on opposite corners.  Each has a good vantage point of the hill and cover.

The Davions send their MG Heavy Weapons to the south and load the north end with their remaining characters.

The Capellans stay tightly grouped in the middle with the hill in easy reach.

Turn 2

The Davions roll high initiative and elect to put their MG Heavy Weapons on overwatch while prepping grenades with all other characters besides the Sniper.

The Liao player rushes the hill with everything he has.  There is no cover.  The rolls are quite low and the effects are devastating.

A Liao Soldier is first up the hill but gets interrupted by the Davion Heavy Weapons.  However the Capellan rolls a higher reflex check and acts first anyways.  He shoots at the Davion Flamer and misses.  Return fire from the MG Heavy Weapons hits hard knocking the Capellan down and causing a bleeding wound.

The Liao Heavy Weapons is next and fires on the Davion Flamer hitting twice.  The Flamer takes big damage but shakes it off with his Pain Resistance trait and ignores the stun effect.

The Squad Leader moves up and shoots at the Davion Soldier and hits solidly causing a stun and bleed.

The Davion Sniper is next to act and puts a bead on the Liao Squad Leader and hits causing a stun.  He then turns his scope to the Heavy Weapons beside the Leader and fires off another round causing damage but no stun due to Pain Resistance.

The Liao Sniper forgoes the relative safety of long range and sprints towards the objective arriving just out of reach.

The Liao Soldier is last to act and he rushes the hill along with his comrades firing on the Davion Soldier for a hit.  The Soldier is knocked down but avoids a bleed effect.

There are several downed characters who are stunned, bleeding or both!  A violent and fast round of combat.

Turn 3

Both Squad Leaders are first to act.  The Liao Leader fires on and hits the Davion Flamer after shaking a stun.  The Davion Leader walks forward and throws his prepared grenade.  The blast kills one of the Capellan Soldiers and causes both a stun and bleed effect on the other.  The Liao Heavy Weapons takes further damage but is ok so far.

The Liao Soldier shakes a stun and fires on the Davion Soldier, hitting for modest damage.

The Davion soldier shakes his own stun and tosses an unprepared grenade into the pile of Capellans atop the hill. (This grenade will detonate later at the end of the turn!)

The Liao Heavy Weapons walks forward and shoots off a burst at the Davion Flamer hitting once and missing once.

The Davion Flamer (still avoiding stun effects via Pain Resistance) walks forward and spews a line of fire that catches two Liao in the area of effect.  The Squad Leader begins to bleed and both are stunned.

The Davion Heavy Weapons attacks his counterpart causing a stun.  The Davion drops prone after his action to remain hidden behind cover.

The Liao Sniper walks into base contact with the objective and fires twice on the Davion Squad Leader for the kill.

The Davion Sniper remains behind cover and puts one bullet into the Liao Heavy Weapons for a kill and another at the Soldier who makes a difficult KO roll.

The previously thrown grenade now detonates and kills two Capellans.  The Liao Sniper successfully downloads the data package and has at least a chance to make a run for it if he can roll a high enough initiative!

Turn 4

The Liao Sniper rolls a 4…

The entire Davion team will get to act before the Liao Sniper and they make short work of the matter.
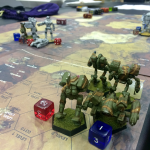
The Davion Heavy Weapons moves up and fires full auto at the lone Sniper causing a stun, bleed, and knockdown.  A second volley from the Federated Barrett finishes the game.

More Time on the Learning Curve

To be honest I did not anticipate the “run up the hill with guns blazing” strategy when I came up with this game.  Even with dealing with new players and teaching them the system, the four turns it took to decide the game seemed short.  I have a few ideas that would make the game better and they boil down to two key concepts.

Movement is Too Fast

I’ve had a hunch about this for a while and this game helped to prove it.  When you can run so far in game, the risk of long range (or medium range!) fire is too low.  I’ve come up with some calculations which I may share in a later post on the matter.  Bringing down movement rates will do a lot to re-balance in favor of more shooty game play (by shooty, I mean overt use of suppression fire and overwatch to contain opponents).
Rolls are Too Low

Ok, I get it, one force ran over the hill and charged into darn near short range with everything.  With no cover and modest range, they should have been low rolls, but I still think they are too low.  Even if I added in medium range and medium cover, the rolls would have been more than manageable for each player given the skill levels involved.  This works in an RPG setting where every character is indeed a hero.  I believe the translation into a BattleTroops style skirmish game deserves a tougher difficulty curve to reward good strategy and tactics.
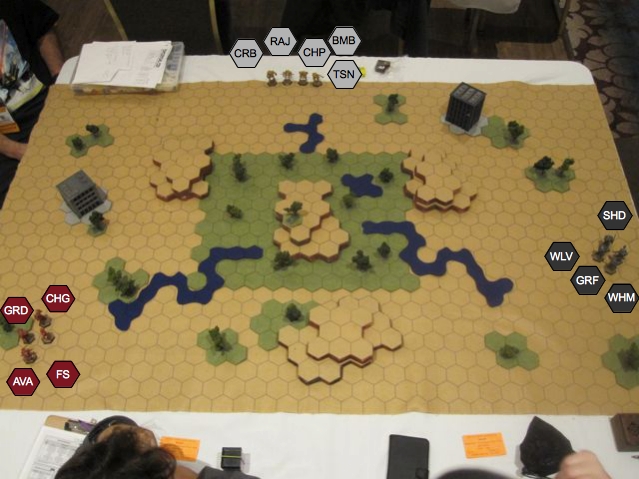
All told, each player still had a good time and the setting and feel is second to none.  A Time of War is not without it’s flaws but at the end of the day it is the setting of choice for man-to-man combat in the 31st century.  No Mech?  No problem.  Get out your man portable machine guns, blazers and needlers and get your game on!

Posted under After Action Report