WorldWorksGames’ A Time of War Terrain

WorldWorksGames
World Works specializes in paper terrain you can print cut and build into fantastic fantasy, scifi, and modern gaming spaces. We jumped at the opportunity to put it to use in Breaking and Entering.
To capture the feel of the inside of a Castle Brian SDS, we purchased two sets of tiles; Codename: Titan and Titan Control.
The Terrainlinx system sold by World Works is a clever kit that makes it possible to create modular terrain pieces that can be mixed and matched to fit any design you can think of. The secret is the shape of the floor tiles and the corresponding tabs that link everything together. I had my doubts at first but when we joined together the first two pieces, I could feel the strength of the connection right away. They certainly did their homework with this design.
As we plunged into the project we found that our own manufacturing tolerances yielded some less than sturdy connections but that was more operator error than not. There is an art to making this terrain work and you get the hang of it after the first few pieces. It is best to complete your first few tiles to completion so you can see and feel how they come together before starting any large batch construction tasks.
Codename: Titan and Titan Control
I recommend 1/4″ posterboard for the floors if you can find it and don’t mind paying a little extra (over the 3/16″ posterboard) as the .GSD files have crease cut lines that will cause you to fold the vertical sides of the floor tiles that thick. If you aren’t consistent on how you fold & glue the sides, you’ll have slight variance in how thick the flooring is, though it really isn’t a big deal in the end when all the floors are connected together.
I also recommend cutting the angled edges of the tabs on the bottom of your floor tiles back so you can easily fold the sides at an angle to match the angle you cut the poster board at. Remember you are supposed to cut the outside edges of the poster board at a 70-80 degree angle under to ensure that they can butt right up against each other. Whatever you do, do them all the same and test it as you go to make sure you aren’t inserting a fatal flaw that won’t allow them to connect properly.
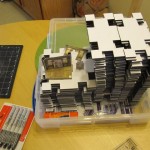
As we progressed through our project we really felt the weight of the task. Let me be brutally honest, this is a LOT of work to put even a modestly sized layout together. Hopefully you can find a friend (or two, or three) to help you out. The payoff is great but you will have put a lot of blood sweat and tears into your terrain by the time you are finished.
Kitbash
The only modifications we felt were needed was the addition on doors that could be opened and closed as the players made their way through the map. After a few tries we settled on a rather quick and easy fix which allowed us to move the doors without too much additional work.
This terrain would never have been finished if we did not have the help of an automated cutting tool. We used a Silhouette SD to speed through the cutting phase of the project. This is my first time using an automated cutting machine and overall it was awesome though not without it’s hiccups.
The first cut I tried, I’m pretty sure I fed it in the right way (bottom first), and part way through, it rolled the guide sheet out in the middle of the cutting and kept going through the process of cutting without the sheet in it. The second time I decided to turn the page around and feed it in ‘backwards’. It cut it upside down, but at least it didn’t roll it out in the middle of cutting. So, I’m really not sure what I did wrong the first time, but I got it to work after that. The point is, don’t expect it to go perfectly. A little practice goes a long way. Here is some knowledge to give you a jump start with using a Silhouette SD:
CR09309K extra sticky carrier sheet: When using the CR09309K extra sticky carrier sheet even the 110lb paper will curl when you peal it off. After folding and gluing the cut pieces however, it was not noticeable. After a few dozen prints, the carrier sheet is less sticky and the paper curls less if at all when you peel it off the carrier sheet.
The clear gridded carrier sheet: The grid on the carrier sheet and the fact that it is clear mean nothing for our purposes. I’m not really sure why they are there, but I’m sure someone else probably has a use for them.
Print vs sticky: Don’t put the printed side of a page against the sticky page holder as the ink will get pulled off. I don’t know what i was thinking. I was probably just a little frustrated that i couldn’t get the machine to work yet. The machine cuts from above and will find three of the marker corners (also from above) to align itself.
But I have 110 lb!: In the ‘Cut Settings’, I had to choose 80lb cardstock when I actually have 110lb, but it worked just fine.
Blue screen: Unfortunately, the program is prone to crashing (no, not to an actual blue screen). They released an update in the middle of this project, though I didn’t notice much difference. After the update there was a sheet that just would not find the calibration marks even with half a dozen tries (the second time almost most always worked before), so I clicked on “try it manually”. I now prefer the manual method. Unfortunately, it isn’t an option until it fails.
Re-load: It was fairly common for me to have to re-load the print and carrier sheet to re-run the ‘Detect registration marks’ process. I found that if I tell it to detect the registration marks before even loading the carrier sheet, it will fail and give me the choice to do it manually. I found that manual is faster and more reliable. It will find the marks every time. No having to reload the paper and wait for the head to travel the width of the paper (which sometimes it did quite slowly).
Cut Settings: Remember to change the cut settings! I kept forgetting when switching cut templates and it would assume it was cutting regular paper. I don’t know exactly what effect the settings have because the time it took to cut didn’t seem to change, but it made a huge difference in whether it cut all the way through or only scored it. Even when using the same blade.
Force the carrier sheet to curl up instead of down! This is a big tip and probably the best idea I had. This greatly improves the life of any of the sticky sheets and even allows you to use thick stock paper on barely sticky carrier sheets. There was barely any tack left and it held just fine. I think it started to cut poorly because the carrier sheet had so many cut marks it was wearing out. Or, I may have simply forgot to change the cut settings to bond instead of paper. Anyway, pile some things up in front and behind the cutter and lean a piece of cardboard (or your game manuals as I did in the picture above) on either pile. This should cause the sticky sheet to bend upwards as it extends out of the Silhouette SD.
Calibrate! This is the calibration to make sure your cutter is moving the head/paper at the speed it thinks it is. You shouldn’t have to calibrate the vertical scale, but you should test it anyway. I don’t have an accurate measuring tool handy, and I doubt many of you do either.
This isn’t how it works, but is how it should work: The calibration print should have print marks to assist with this. One long line along the top of the page and 5mm dashes set 0.1mm offset. The mark that is actually 200mm away should be marked as such and the others should be marked with how the cut should be adjusted if it was cut on that mark. The machine should cut a line (or dashes so you can peel the sheet off easier) along the top line and where it thinks 200mm away is. The instructions were pretty poor in that they were unclear on some very important parts. With just a little testing, you too can figure it out though… If the cut is to the Right/Down of the X mark, the sliders need to be set to the Left/Up. These instructions should really be printed right on the calibration sheet.
Alignment: Alignment on the carrier sheet doesn’t have to be perfect. It will find 3 corners and know where to cut. As far as placement of the sheet to be cut on the carrier sheet or feeding the carrier straight into the machine is concerned, close is good enough as long as the pattern stays within the machine’s cutting width.
Wait, did I calibrate that yet? Unfortunately, the software continues to give you the choice to cut, even though you just unloaded the piece and loaded another piece. It should only give you the option to find the calibration marks. I keep forgetting if I ran the ‘find marks’ or not, so quite often I probably ran it twice.
Posted under Terrain


